


If you're getting started in interior design, one of the first skills you need to learn is sketching. Sketching helps you bring your ideas to life and see your designs before they become real. Learning to sketch interior designs can be tough, but with the right tips and tricks, you can do it. Let's dive into some practical sketching tips to help you on your drawing journey!
Use a Grid for Balance and Proportion
Using a grid is a great way to keep your sketches balanced and proportional. This simple tool can be super helpful for beginners in interior design. Let's see why.
Why Balance and Proportion Matter Balance and proportion are key to any good interior design sketch. They make sure your design elements fit together nicely, creating a realistic look. Without them, your design might look off or distorted, which is something we want to avoid.
How a Grid Helps
Why Balance and Proportion Matter Balance and proportion are key to any good interior design sketch. They make sure your design elements fit together nicely, creating a realistic look. Without them, your design might look off or distorted, which is something we want to avoid.
How a Grid Helps
- Consistent Scale: Grids help you keep the scale of your design elements consistent. For example, when sketching a living room, your sofa won’t look tiny next to a huge coffee table.
- Alignment: Grids make it easy to align different elements in your design. This is especially useful for items on the same plane, like a row of picture frames or shelves.
- Proportion: Grids help you maintain the right proportions among the various parts of your design, so your rooms won’t look like they’re bending or warping in weird ways.
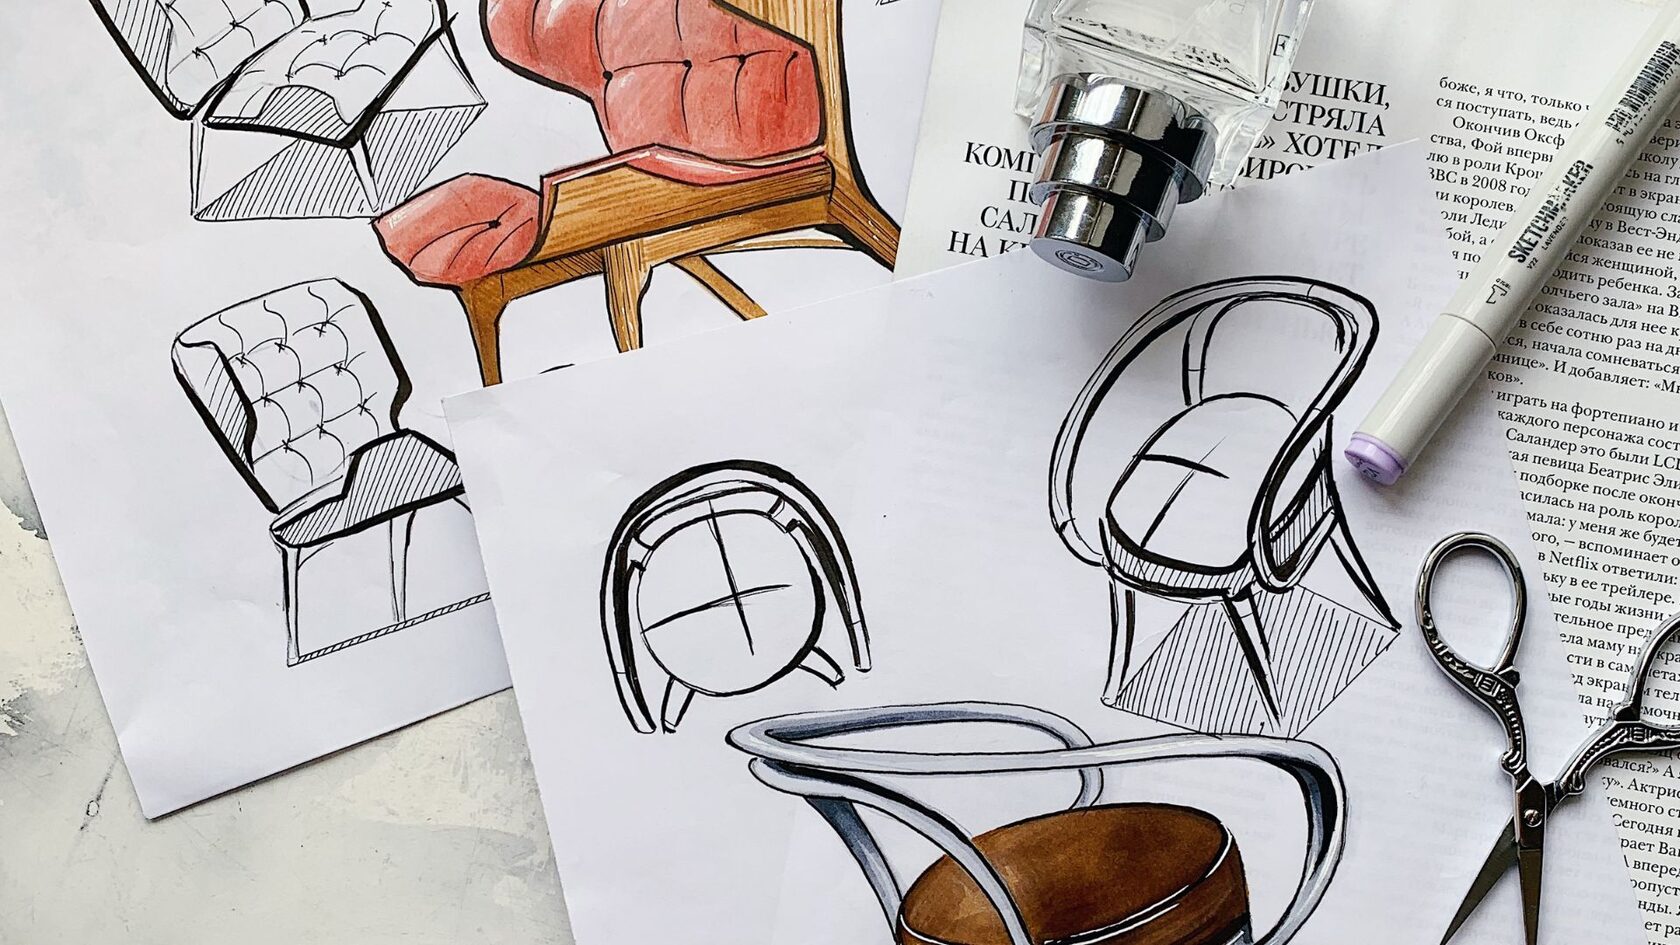
Try Different Sketching Techniques
Sketching is like trying out different recipes—there are many ways to do it, and the best one depends on what you like. Just as there are countless recipes to explore, there are plenty of sketching techniques to discover for interior design. Let's explore some of the most useful ones:
Line Drawing
Line drawing is essential in sketching. It's simple and clear, making it great for expressing your design ideas effectively. Here’s how it works:
Sketching lets you be creative and experiment with different techniques until you find what works best for you!
Line Drawing
Line drawing is essential in sketching. It's simple and clear, making it great for expressing your design ideas effectively. Here’s how it works:
- Outline: Begin by drawing the outlines of your design elements. This sets up the basic structure of your sketch.
- Detail: Once you have the outlines, add details. For example, if you're sketching a chair, add details like the upholstery pattern and cushion buttons.
- Refine: Step back and review your sketch. Use an eraser to make any necessary adjustments.
Sketching lets you be creative and experiment with different techniques until you find what works best for you!
Shading
To give your sketches depth and dimension, shading is key. Here’s how to do it:
To give your sketches depth and dimension, shading is key. Here’s how to do it:
- Light Source: Figure out where your light is coming from. This will show you where shadows should go.
- Light to Dark: Use lighter strokes for areas closer to the light source, and darker strokes for areas further away.
- Gradient Effect: Instead of using one flat color, blend shades together to create a gradual change in light and shadow.
Two-Point Perspective
Want your sketches to look 3D and realistic? Try two-point perspective:
As you try out these techniques, you’ll develop your own style. Keep practicing, experimenting, and enjoying the journey of learning how to sketch for interior design!
Want your sketches to look 3D and realistic? Try two-point perspective:
- Horizon Line: Imagine where the sky meets the ground—it’s your eye level.
- Vanishing Points: These are on the horizon line. All lines in your sketch will head towards these points.
- Vertical Lines: Draw these straight up and down to show how tall things are in your sketch.
As you try out these techniques, you’ll develop your own style. Keep practicing, experimenting, and enjoying the journey of learning how to sketch for interior design!
Begin a journey to master the art of interior sketching with us! Whether you prefer traditional manual techniques or the versatility of Procreate on the iPad, our expert guidance will lead you through the process with precision and style.
Discover the principles of perspective drawing, from one-point to two-point variations, and learn to infuse your sketches with depth and dimension. Dive into floor planning as we explore drawing various types of rooms, including living rooms, bedrooms, kitchens, bathrooms, hallways, and dining rooms. Join us and unleash your creativity as you hone your interior sketching skills to perfection!
Discover the principles of perspective drawing, from one-point to two-point variations, and learn to infuse your sketches with depth and dimension. Dive into floor planning as we explore drawing various types of rooms, including living rooms, bedrooms, kitchens, bathrooms, hallways, and dining rooms. Join us and unleash your creativity as you hone your interior sketching skills to perfection!

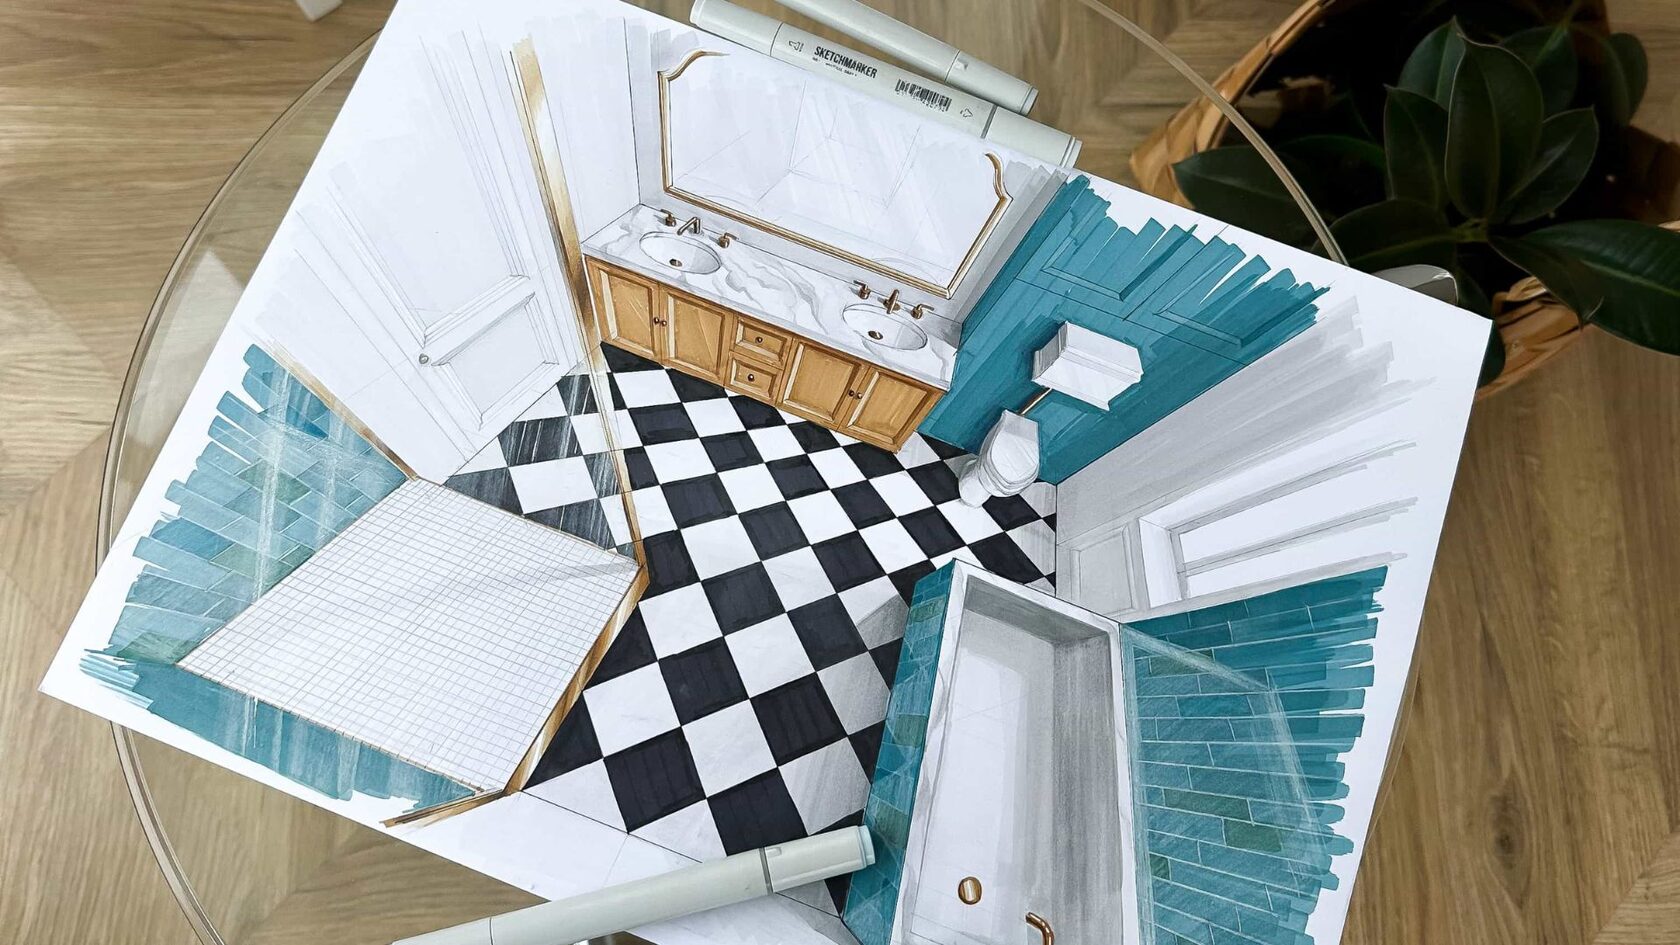
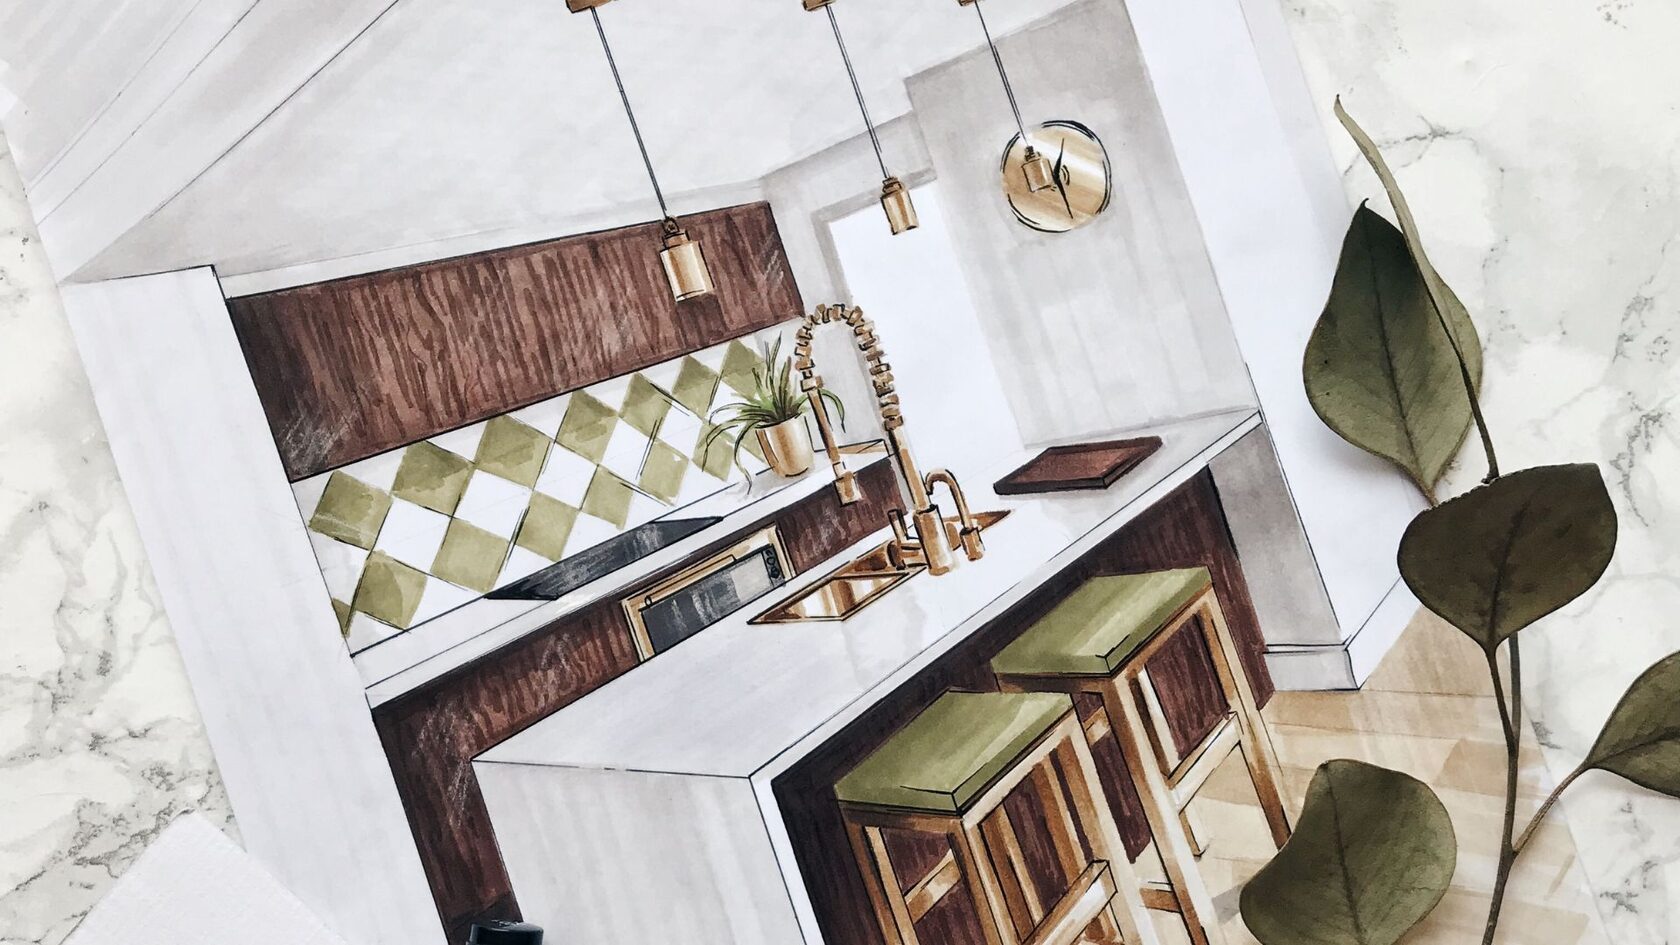
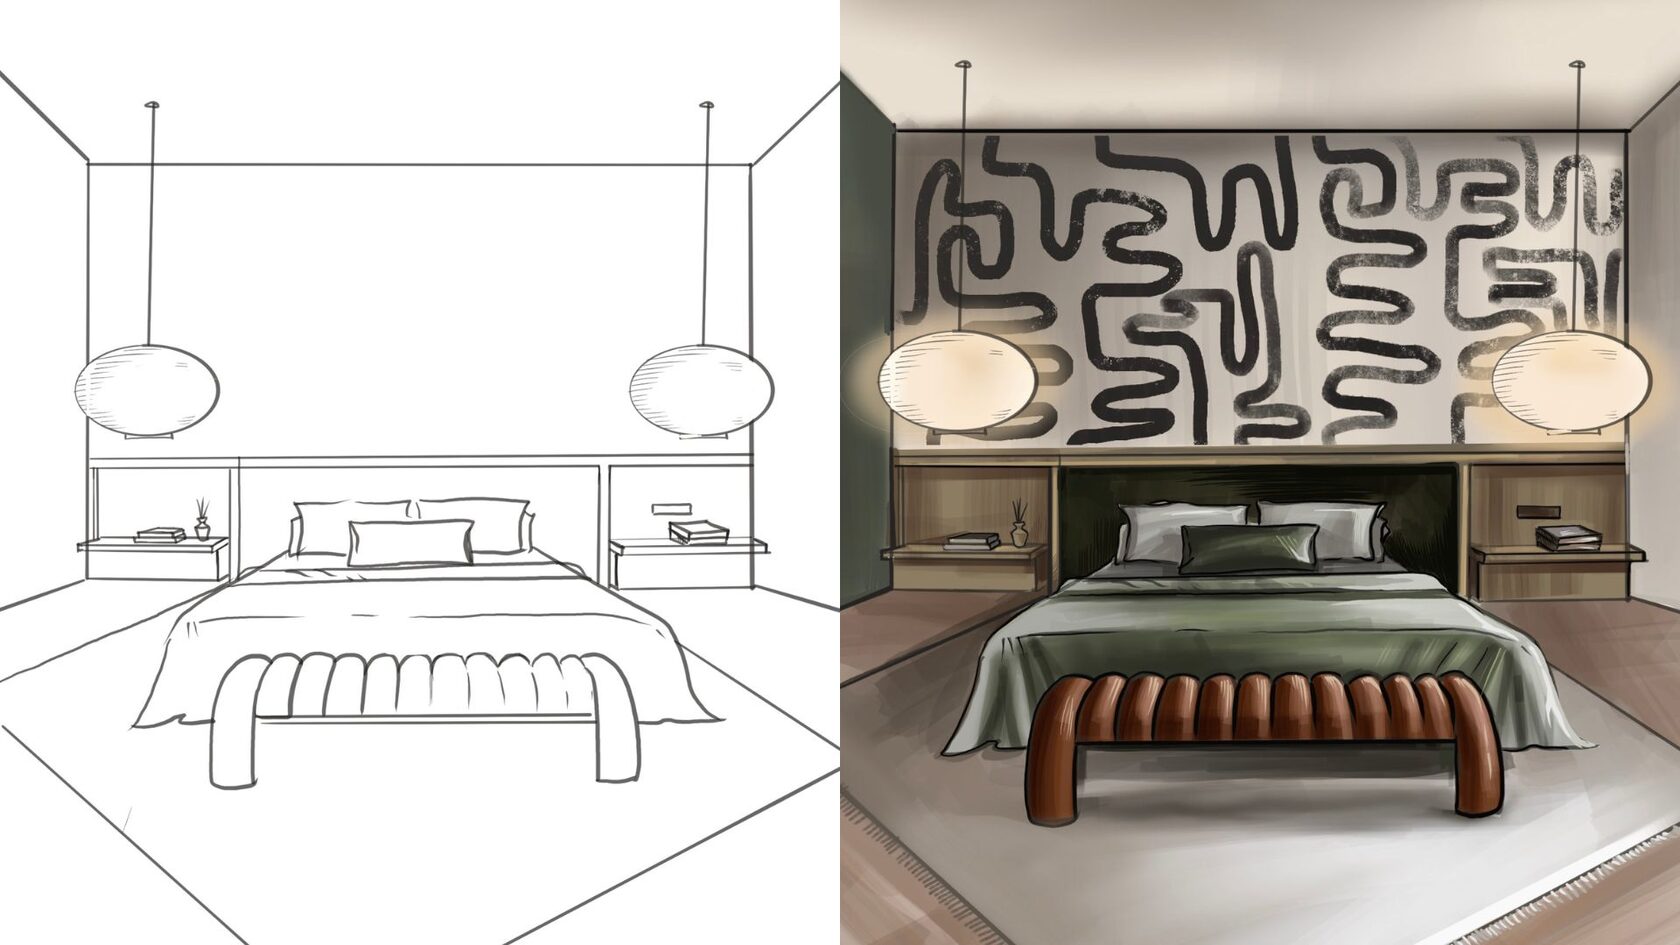
Adding Color and Texture
When you add color and texture to your sketches, they come alive with depth and vibrancy. While black and white sketches are classic, color and texture can make your interior designs pop. Here’s how to do it:
Adding Color
Color sets the mood and ties your design together. Follow these steps to add color:
Adding Color
Color sets the mood and ties your design together. Follow these steps to add color:
- Choose Your Palette: Decide on a color scheme that suits your design—like cool blues for a modern look or warm reds for a cozy vibe.
- Apply Color: Use colored pencils, markers, or watercolors to fill in your sketch. Start with lighter shades and layer on more color as needed.
- Consider Lighting: Light affects how colors appear. Adjust the intensity of your colors based on where your light source is in your design.

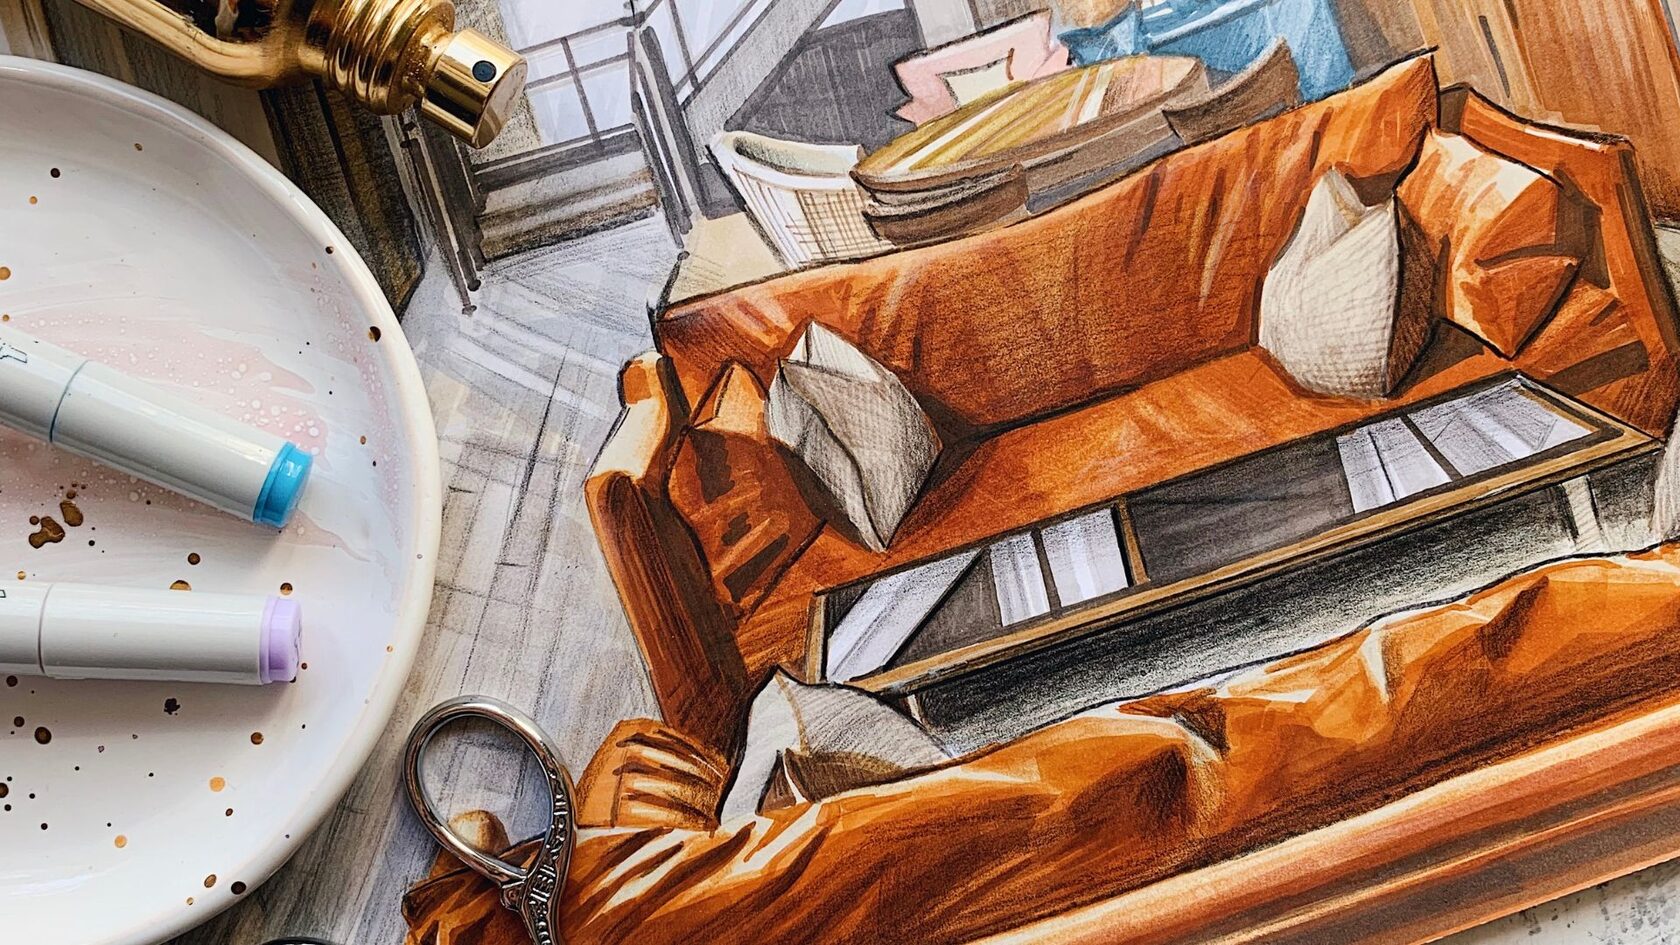
Adding Texture
Texture gives depth and richness to interiors, making them feel complete and dynamic. Here’s how you can capture texture in your sketches:
Texture techniques involve methods like cross-hatching, stippling, and other approaches used to represent different textures in sketches. For instance, cross-hatching can create the appearance of a rough brick wall, while stippling can mimic the texture of a plush carpet. These techniques add depth and realism to drawings by simulating the tactile qualities of various surfaces.
Shadow and light: Utilize shading to illustrate how light interacts with various surfaces. This technique enhances realism and brings out the texture in your sketches.
Adding color and texture to your sketches is like seasoning a dish—it elevates your designs and brings them to life. So keep exploring and enjoy the creative process!
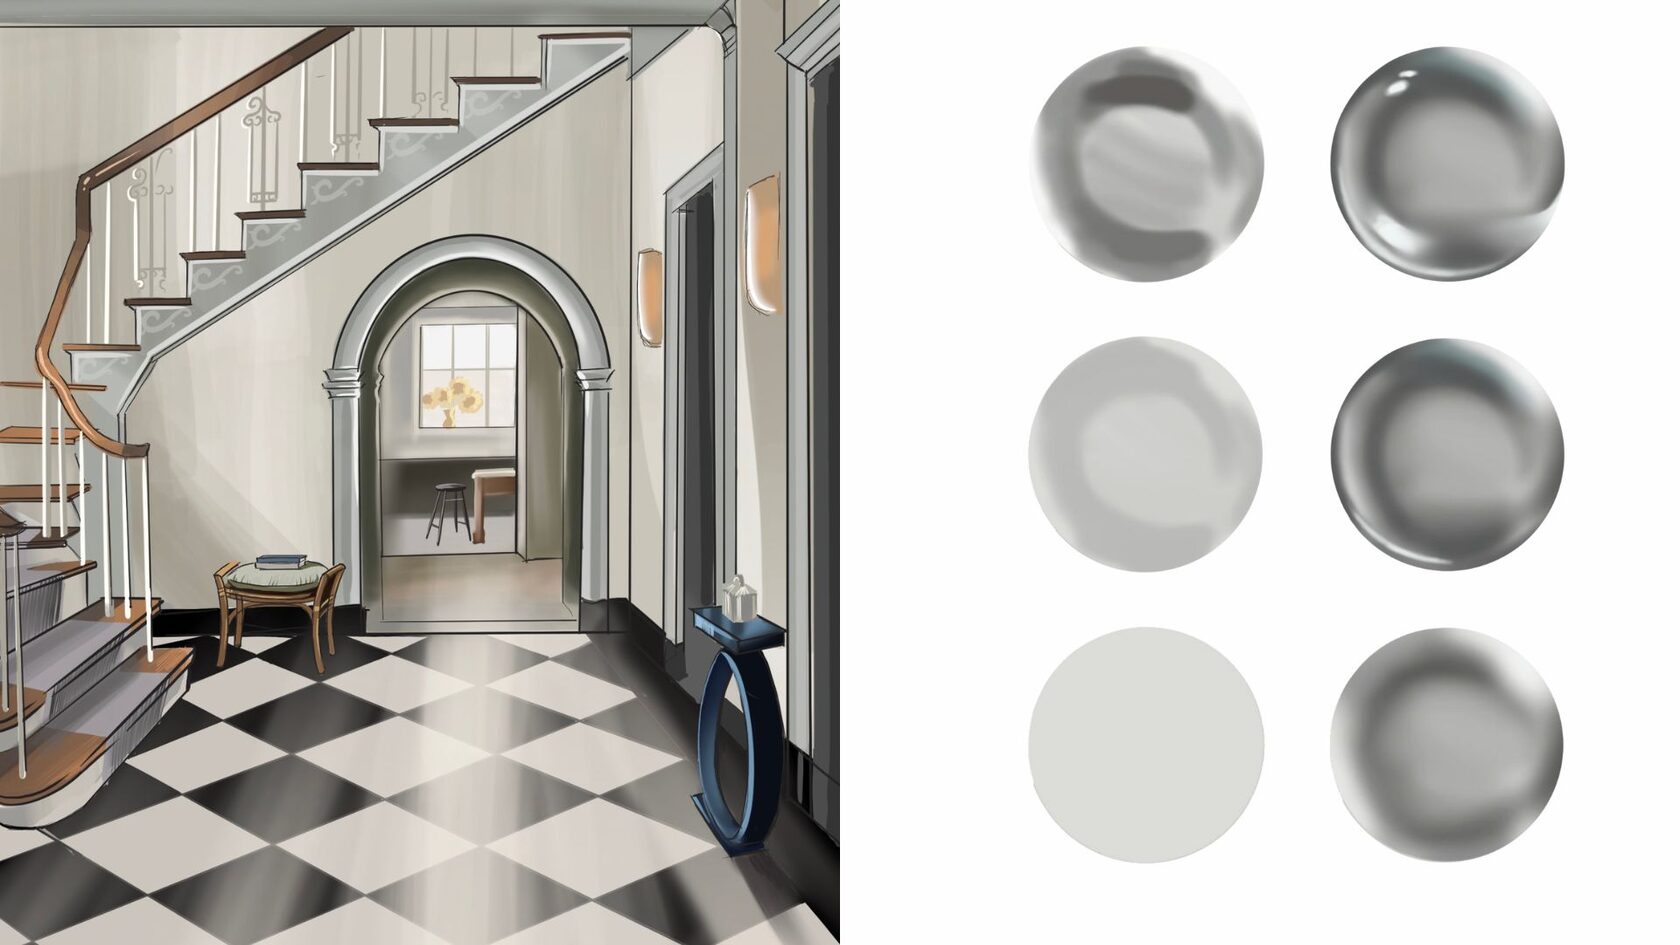
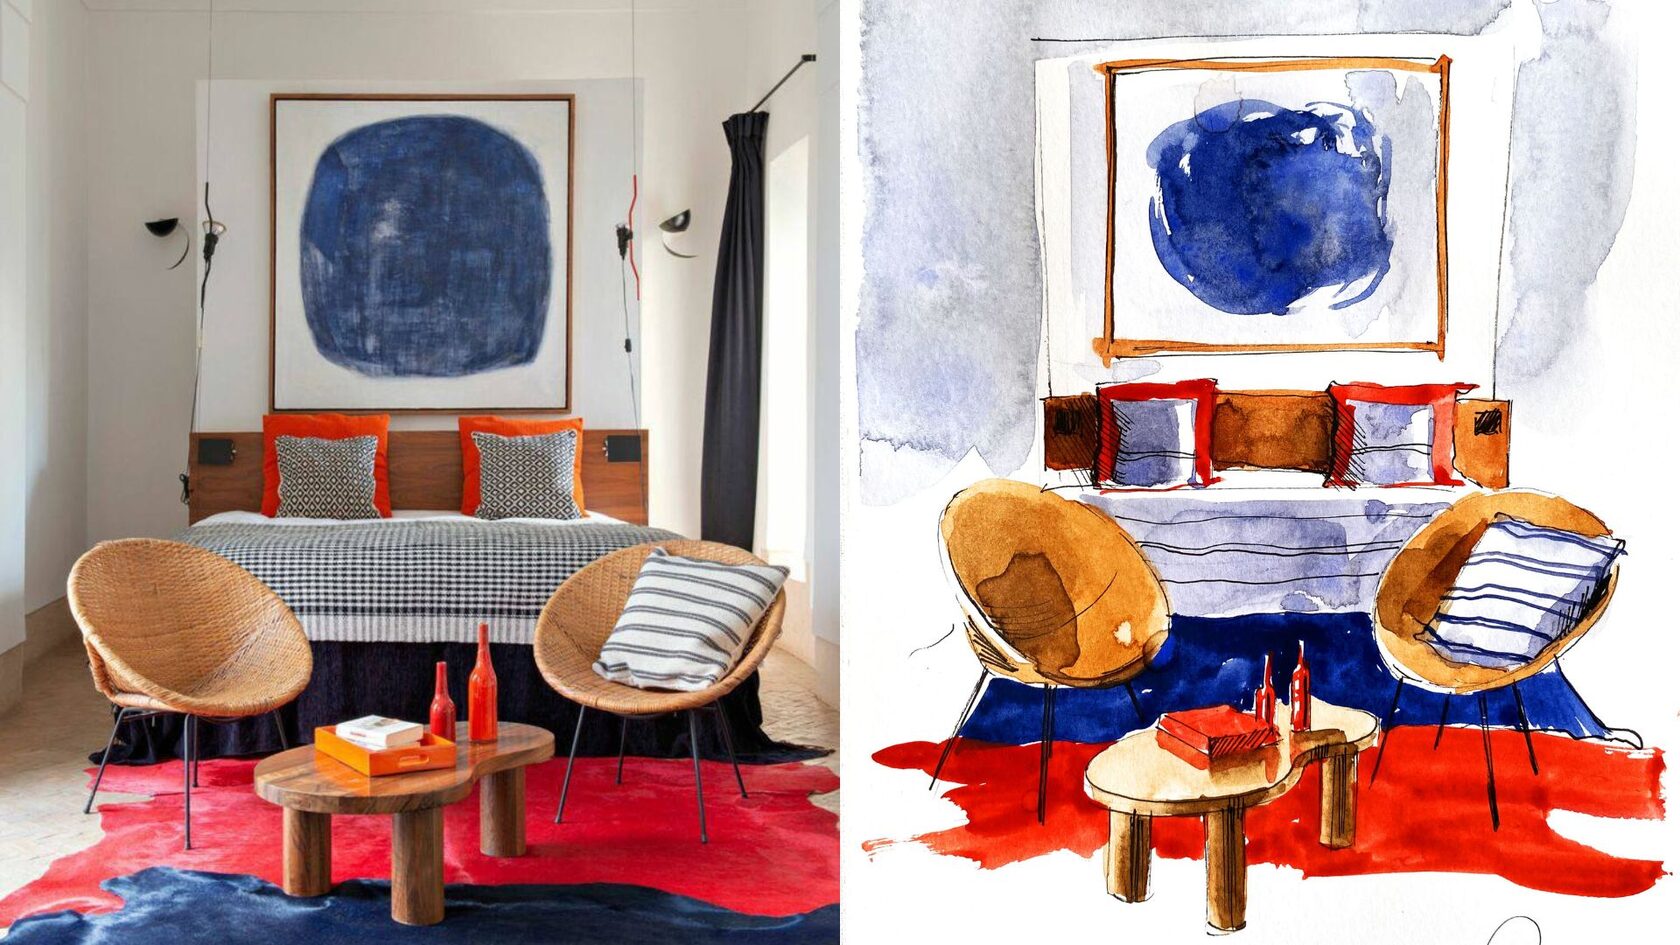
Learn to Capture Light and Shadow
Picture entering a room filled with the warm glow of a setting sun or the intriguing shadows in a sleek, modern space. Light and shadow are powerful tools in your interior design sketches. They can add depth, set the mood, and make your drawings feel real. Let's see how you can master capturing them.
Understanding Light Light does more than illuminate—it transforms interior design. Follow these steps to capture it in your sketches:
Understanding Light Light does more than illuminate—it transforms interior design. Follow these steps to capture it in your sketches:
- Identify the light source: Determine where the light is coming from—a window, lamp, or skylight. This helps you envision how it will illuminate your space.
- Sketch the light: Use lighter shades to show areas directly hit by light. You can leave spaces blank or lightly erase to create these bright spots.
- Adjust intensity: Light isn't uniform. Some areas may be brightly lit, while others are softly diffused. Use different shades to reflect these variations.
Mastering Shadows
Shadows are crucial for adding depth and realism to your sketches. Here's how to sketch them effectively:
Observe Shadows: Study how shadows naturally fall in real life. They tend to be darker and sharper near objects and softer and lighter as they move away.
Sketch the Shadows: Use darker shades to depict shadowed areas. Remember, shadows aren't always pure black; they can vary in shades of gray or even have subtle hints of color.
Consider the Light Source: The direction and intensity of your light source will influence how shadows appear. Keep this in mind as you draw.
As you practice sketching for interior design, remember that mastering light and shadow is key to creating lifelike and compelling designs. Take your time to observe and experiment—it will improve your skills over time!
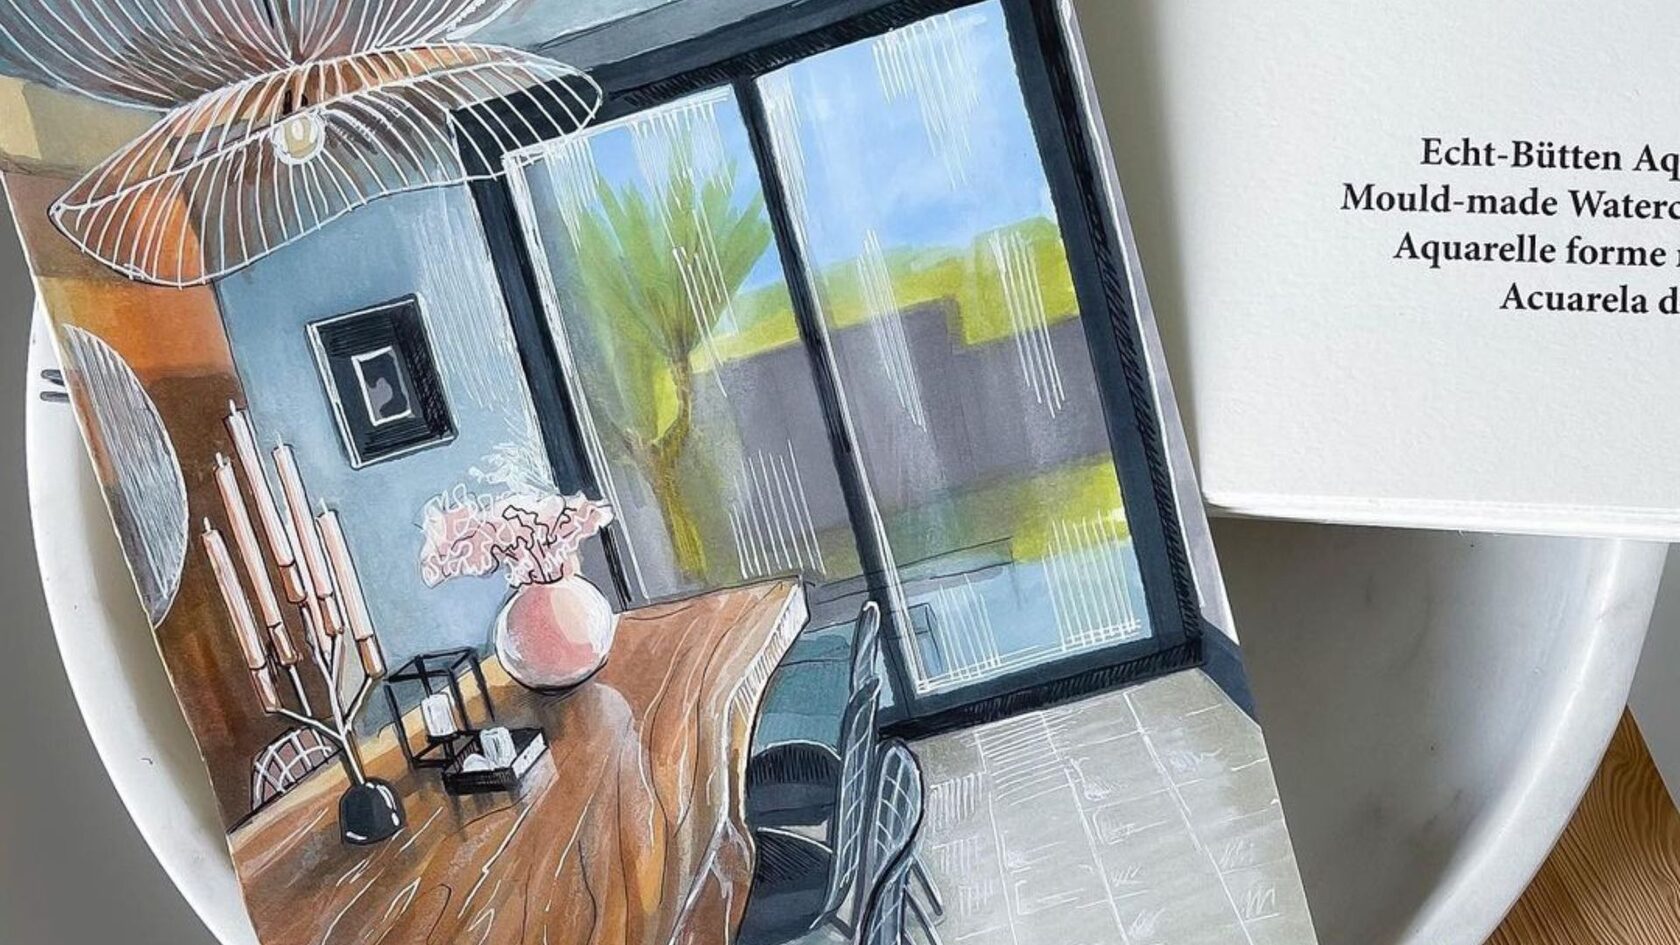
Practice with Real-Life Settings
The world around you is full of inspiration. So why not use it to improve your interior design sketching skills? Practicing with real-life settings helps you grasp scale, balance, and how different elements fit together in a space. Here’s how you can make the most of this practice.
Start by selecting a space that intrigues you. It could be your living room, a cozy café, or a room from a magazine. The key is to pick a space that captivates you and makes you eager to sketch.
When learning how to sketch interior designs, it can be overwhelming to tackle an entire room at once. Here’s a tip: break it down. Begin by sketching the big elements like walls and furniture, then move on to smaller details such as decorations and textures. This approach makes the process less daunting and more manageable.
View these practice sessions as learning opportunities. Try out different techniques, play with colors and textures, and don’t worry about making mistakes. This experimentation helps you grow as a designer. Remember, the goal isn’t perfection every time—it’s about learning, improving, and enjoying the journey.
So grab your sketchbook and start exploring the world through sketches! If you found these practical tips helpful and want to enhance your skills further, consider joining our online course on Interior Design Sketching.


