


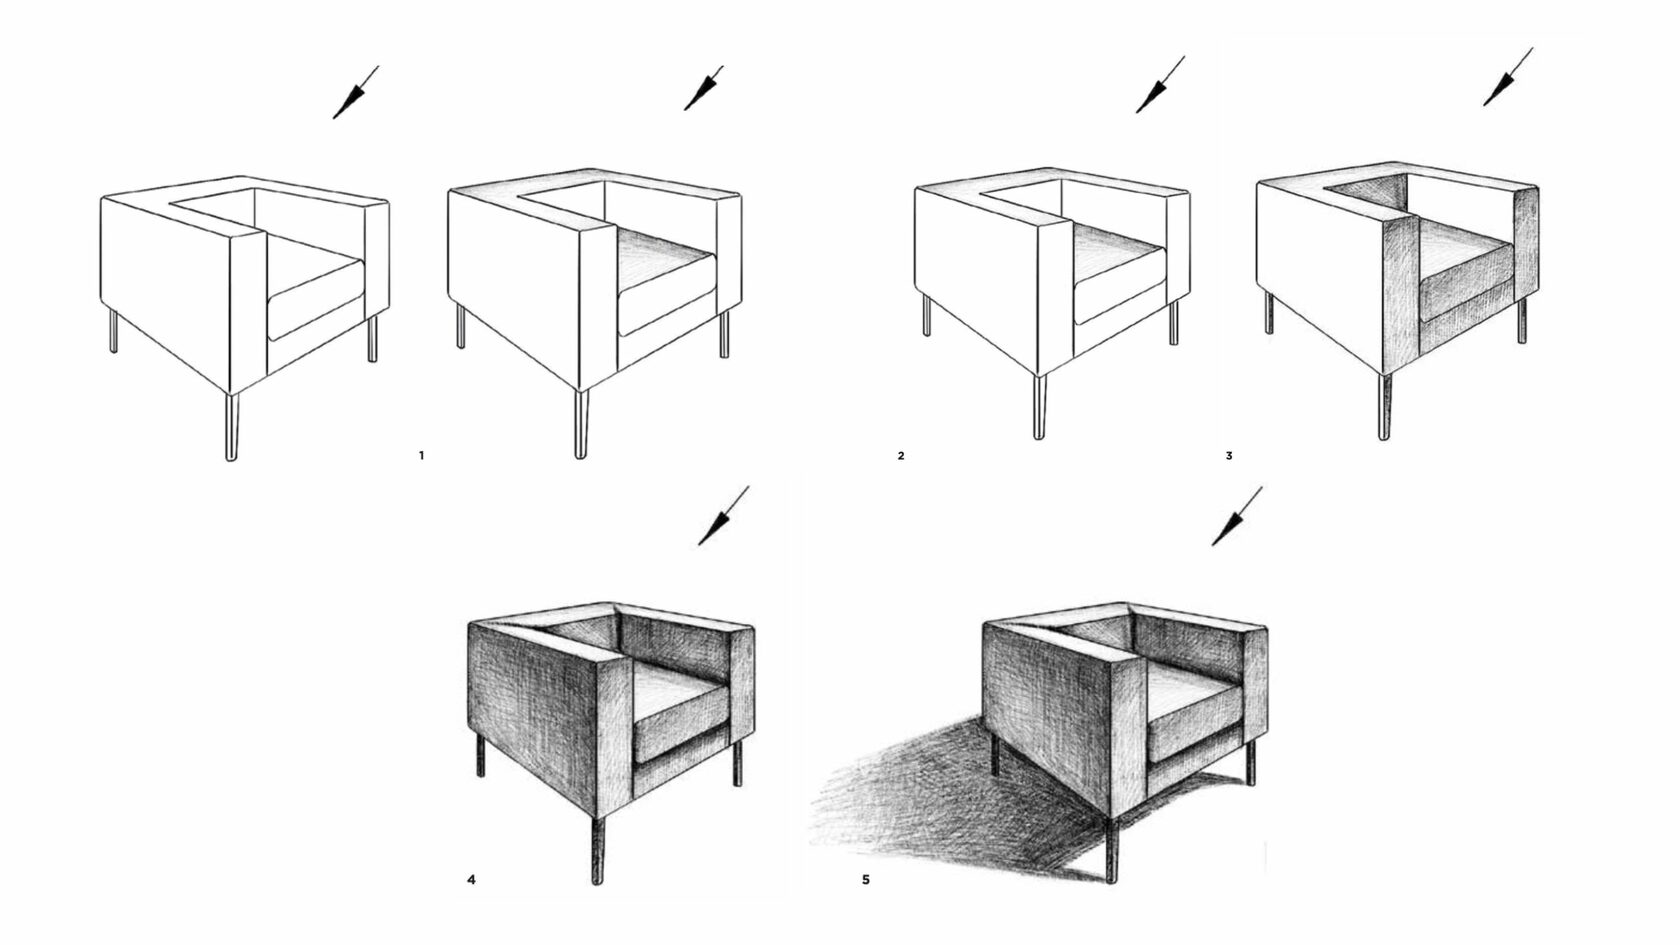
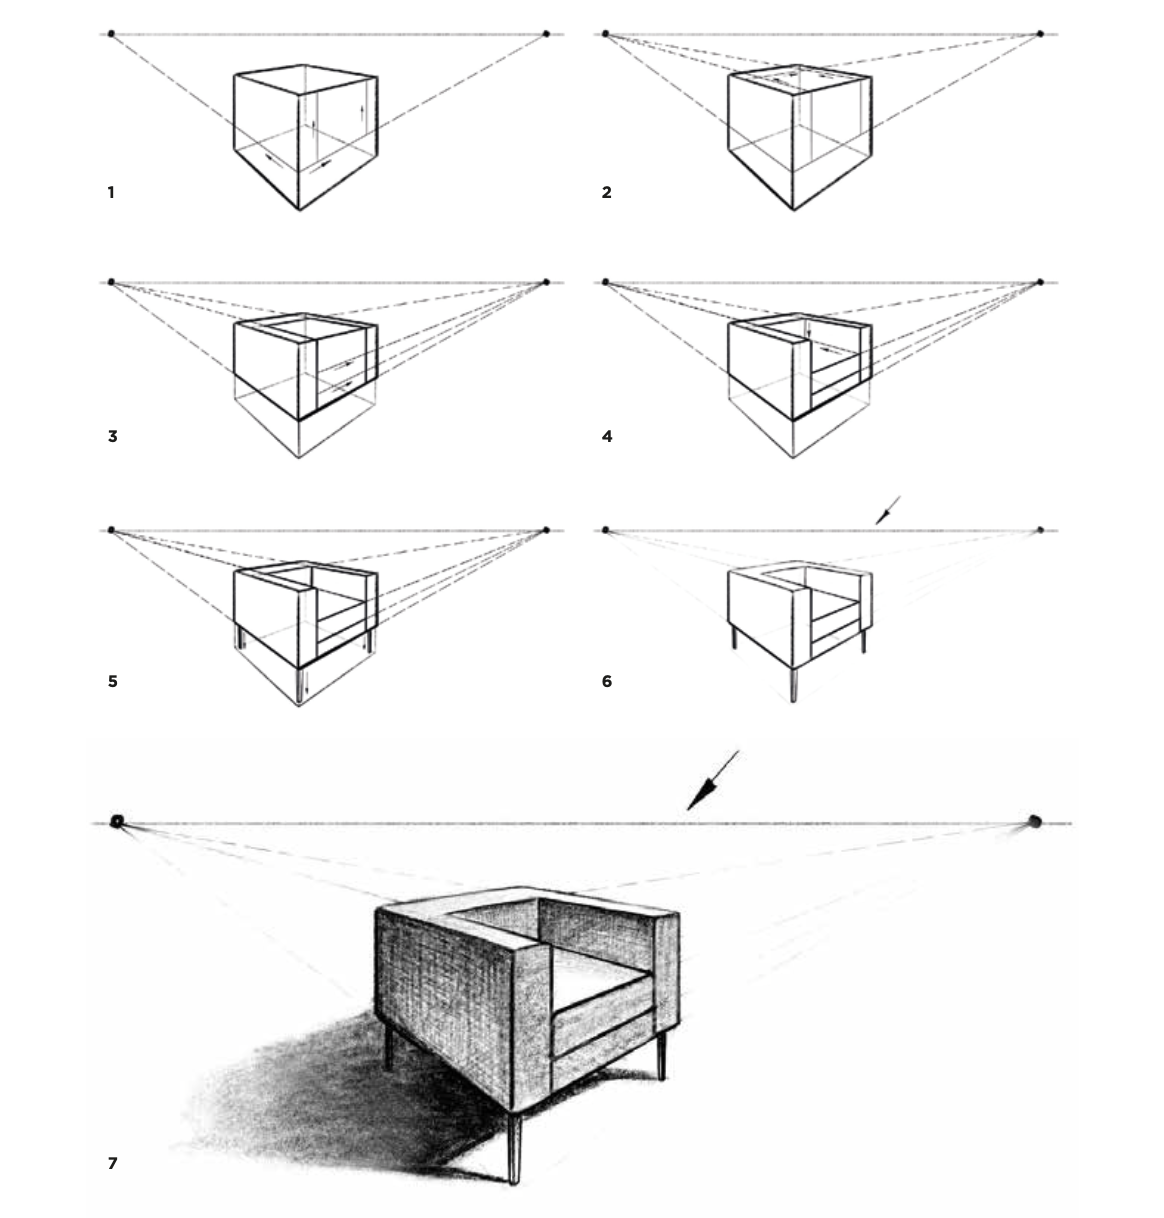
Just getting started with interior desing sketching? You're in the right spot! With this guide, we'll walk through building a rectangular chair in angular perspective and analyze its shading step by step. Let's dive in!
For drawing a chair, you can use simple materials like a pencil and paper or opt for digital tools like Procreate for more advanced techniques and flexibility.
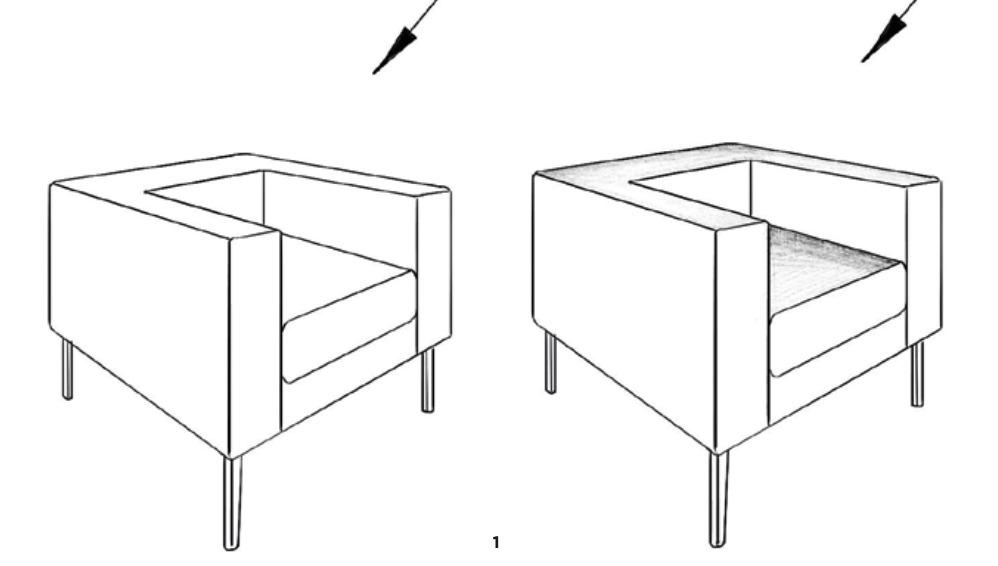
In this scene, the lightest area is the upper horizontal edge of the chair, as it is closest to the light source, resulting in more illumination. Similarly, the seat also appears relatively lighter due to its horizontal orientation, but it still retains some shading from the shadows cast by the backrest and armrest.
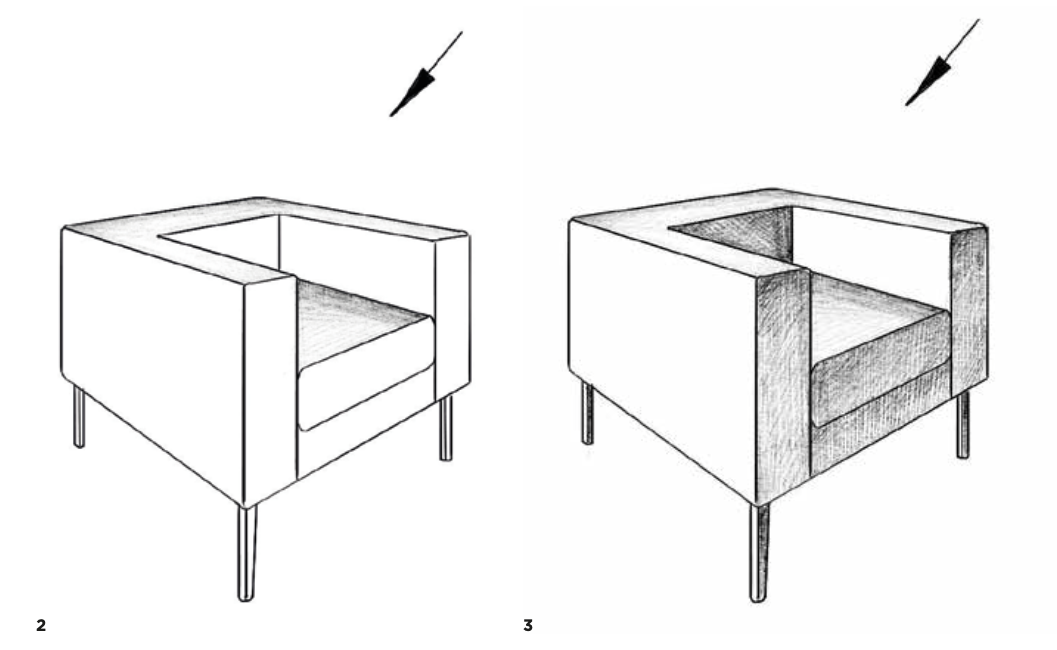
Furthermore, to add depth and realism to the drawing, it's essential to incorporate penumbra to the vertical edges on the right side, including those of the legs. Penumbra refers to the gradual transition from light to shadow, contributing to the three-dimensional appearance of the chair.
Furthermore, to add depth and realism to the drawing, it's essential to incorporate penumbra to the vertical edges on the right side, including those of the legs. Penumbra refers to the gradual transition from light to shadow, contributing to the three-dimensional appearance of the chair.
The top horizontal edge of the chair appears the lightest as it is nearest to the primary light source, receiving the most direct illumination. Similarly, the seat, being positioned horizontally, also exhibits a lighter tone. However, shadows cast by the backrest and armrest contribute to its shading.
To enhance the realism and depth of the drawing, it's crucial to introduce penumbra to the vertical edges on the right side, encompassing the chair's legs. Penumbra, characterized by a gradual transition from light to shadow, helps create the illusion of volume and dimensionality, adding to the overall visual appeal of the sketch.
To enhance the realism and depth of the drawing, it's crucial to introduce penumbra to the vertical edges on the right side, encompassing the chair's legs. Penumbra, characterized by a gradual transition from light to shadow, helps create the illusion of volume and dimensionality, adding to the overall visual appeal of the sketch.

Discovering the art of interior design sketching is just a click away! Dive into our online courses, available in both manual techniques and Procreate. Unleash your creativity as you explore techniques for creating depth in drawings, master the rendering of different textures and materials, and gain a solid understanding of perspective and floor plans. Whether it's sketching a cozy living room or a sleek bathroom, our courses will equip you with the skills needed to bring your design ideas to life. Don't miss out—enroll now and embark on your creative journey!
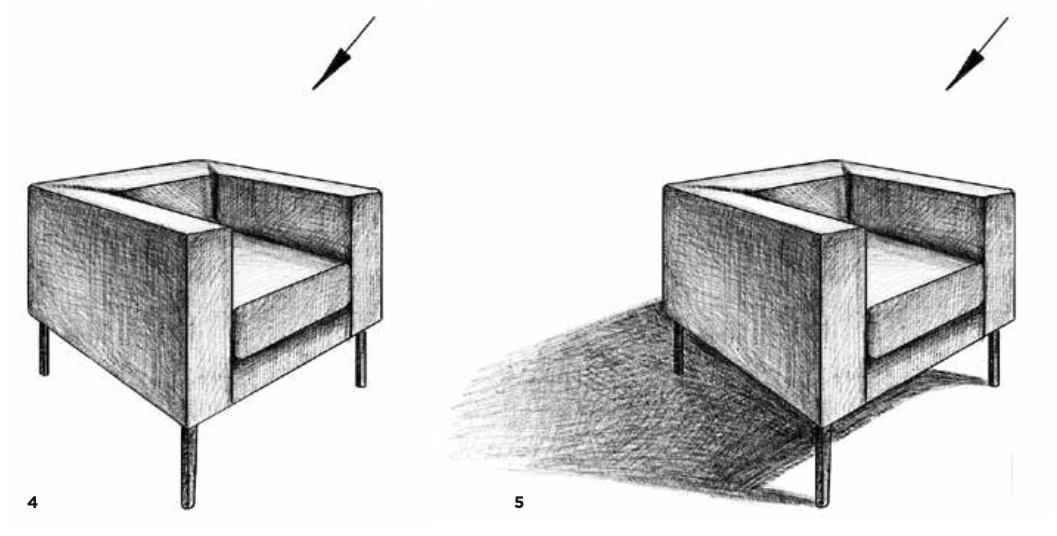
To further refine the drawing, it's essential to incorporate shadows along the vertical edges on the left side of the chair. These shadows help delineate the form and add depth to the overall composition.
Additionally, consider adding a falling shadow cast by the pillow onto the surface of the chair. This shadow should enhance the shading within the folds of the chair, emphasizing the contours and creating a more realistic depiction. By paying attention to these details, you can elevate the visual impact of the sketch and achieve a more polished result.
Additionally, consider adding a falling shadow cast by the pillow onto the surface of the chair. This shadow should enhance the shading within the folds of the chair, emphasizing the contours and creating a more realistic depiction. By paying attention to these details, you can elevate the visual impact of the sketch and achieve a more polished result.

To enhance the realism of the drawing, it's crucial to incorporate a falling shadow that gradually dissipates as it moves away from the chair. This shadow adds depth and dimensionality to the composition, grounding the chair within its environment.
Additionally, pay close attention to the strokes used to render the chair, particularly focusing on the edges closer to the viewer. By highlighting these edges, especially along the shadow's edge, you can create a sense of contrast and definition, further emphasizing the form of the chair. Be sure to enhance the reflex, or reflected light, along these highlighted edges, adding a touch of luminosity and bringing the drawing to life.
Additionally, pay close attention to the strokes used to render the chair, particularly focusing on the edges closer to the viewer. By highlighting these edges, especially along the shadow's edge, you can create a sense of contrast and definition, further emphasizing the form of the chair. Be sure to enhance the reflex, or reflected light, along these highlighted edges, adding a touch of luminosity and bringing the drawing to life.
In conclusion, mastering the art of drawing a chair involves attention to detail, understanding light and shadow, and honing your sketching techniques. By following the step-by-step instructions provided in this article, you've taken a significant step towards enhancing your drawing skills and expanding your artistic repertoire. Remember, practice makes perfect, so keep experimenting, refining your approach, and exploring new subjects. With dedication and perseverance, you'll continue to grow as an artist and unlock new possibilities in your creative journey. So grab your sketchbook or fire up your drawing tablet, and let your imagination soar as you embark on your next drawing adventure!


