


Drawing an apple is a classic exercise for artists of all skill levels. It teaches important principles of form, shading, and observation. In this step-by-step tutorial, we will guide you through the process of drawing an apple, from basic shapes to realistic shading. So grab your pencil and let's begin!
To draw an apple you will need
- Paper;
- pencil;
- ruler;
- eraser.
We have already realized that the easiest way to start your artistic experience of depicting a person is with a simple pencil and ordinary paper. If you have not done drawing before, then a drawing online course for beginners can be considered an excellent way to get acquainted with the basic concepts of working with a simple pencil. This is an excellent opportunity to learn to distinguish pencils by degree of rigidity, master simple shapes and figures, learn how to make simple drawings, including learning how to depict a human figure.
It is better to start working with a simple pencil with an HB, that is, a hard-soft pencil. All other pencils are important for drawing details, adding shadows and penumbras, applying different shades for different lines.
How to draw an apple with a pencil step-by-step drawing tutorial
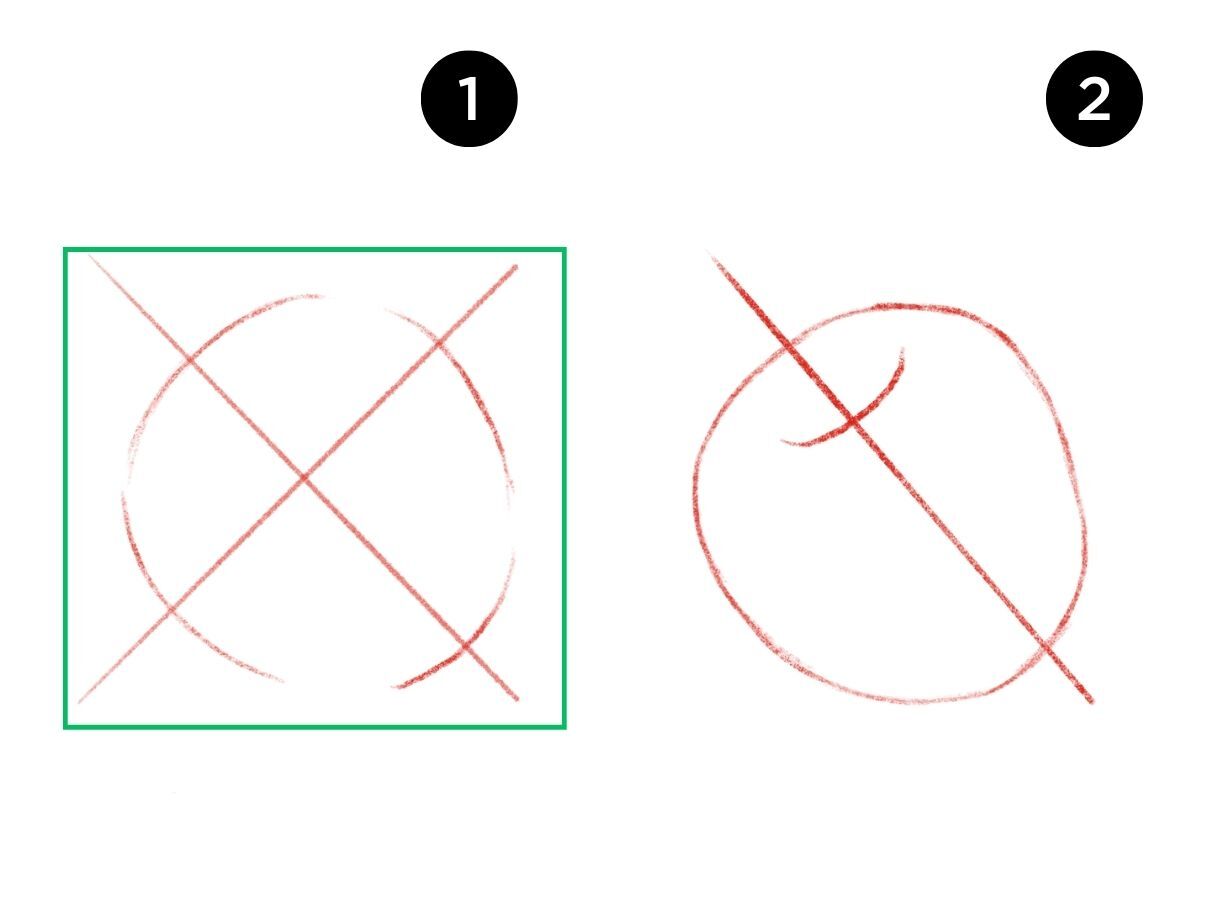
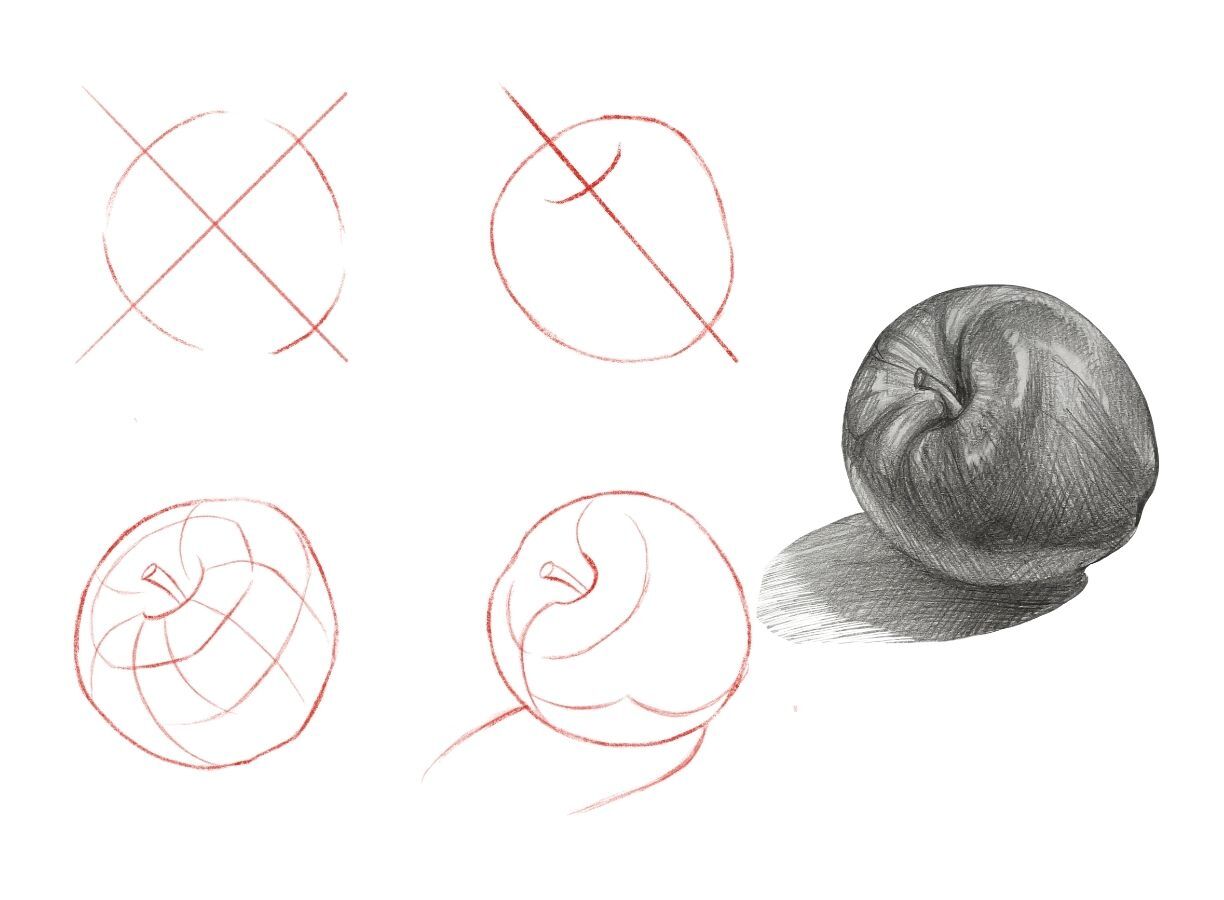
Draw the shape of an apple using a square box. Draw a large square. Divide this square into four equal smaller squares.
Use the grid to help you draw the shape of an apple inside the large square.
The grid will guide your proportions and curves, making it easier to sketch a balanced and symmetrical apple. After draw a stick and leaves above the apple.
Use the grid to help you draw the shape of an apple inside the large square.
The grid will guide your proportions and curves, making it easier to sketch a balanced and symmetrical apple. After draw a stick and leaves above the apple.
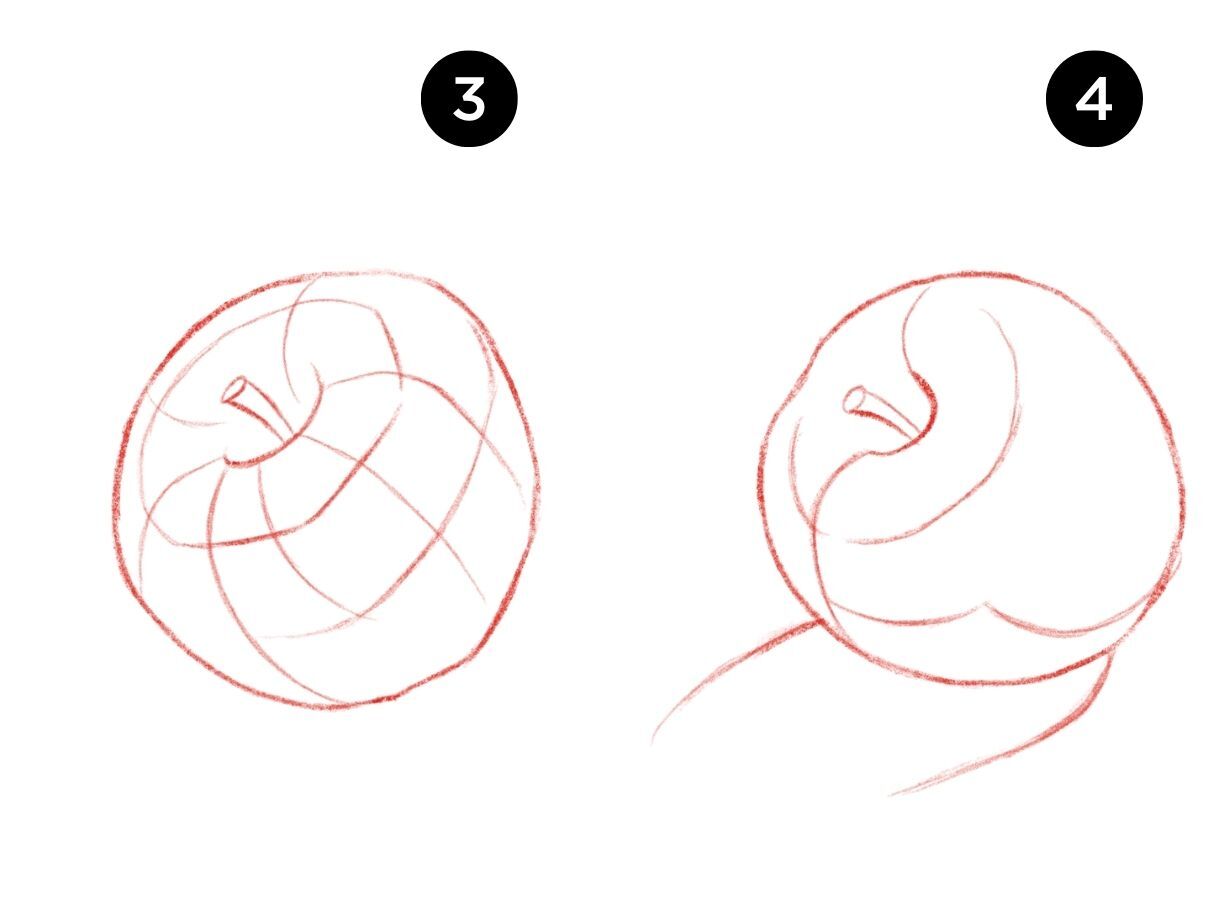
Using a soft pencil, without pressing hard, mark the dark areas on our apple and its leaves. In this step, continue hatching the apple drawing. Press harder on the pencil and draw the new lines along the already marked areas, while expanding them, making a transition between shades. To make the area darker, we can paint cross over, see the picture below (option a). Or first we draw parallel lines (option b), then on top of them, the same lines, only longer, and where to make a dark area also cross to cross (option c), a diluted option just below the main one (option d).

Hatch over the bottom of the apple and the side part. In the middle of the apple use just straight lines. It is not necessary to paint over much, because light shines on this side of the apple in our drawing. In the last step of our apple drawing tutorial, you can take a piece of cotton wool or use your finger, and smear the main part of the apple. Do not touch the leaves and the stick as they are not supposed to be glossy. The apple will turn out to be almost homogeneous. Where it is necessary to be darker, as we had before smearing, you can take a pencil and hatch again over and smear there, and so on until you are satisfied with the result.
If you didn’t succeed in drawing a tulip on the first try, don’t despair, maybe it’s just time to take a basic drawing course.
How to draw an apple with acrylics step-by-step drawing tutorial
It is easy to draw an apple. They are basically a round shape. No need to be exact. Apples come in different sizes and shapes.
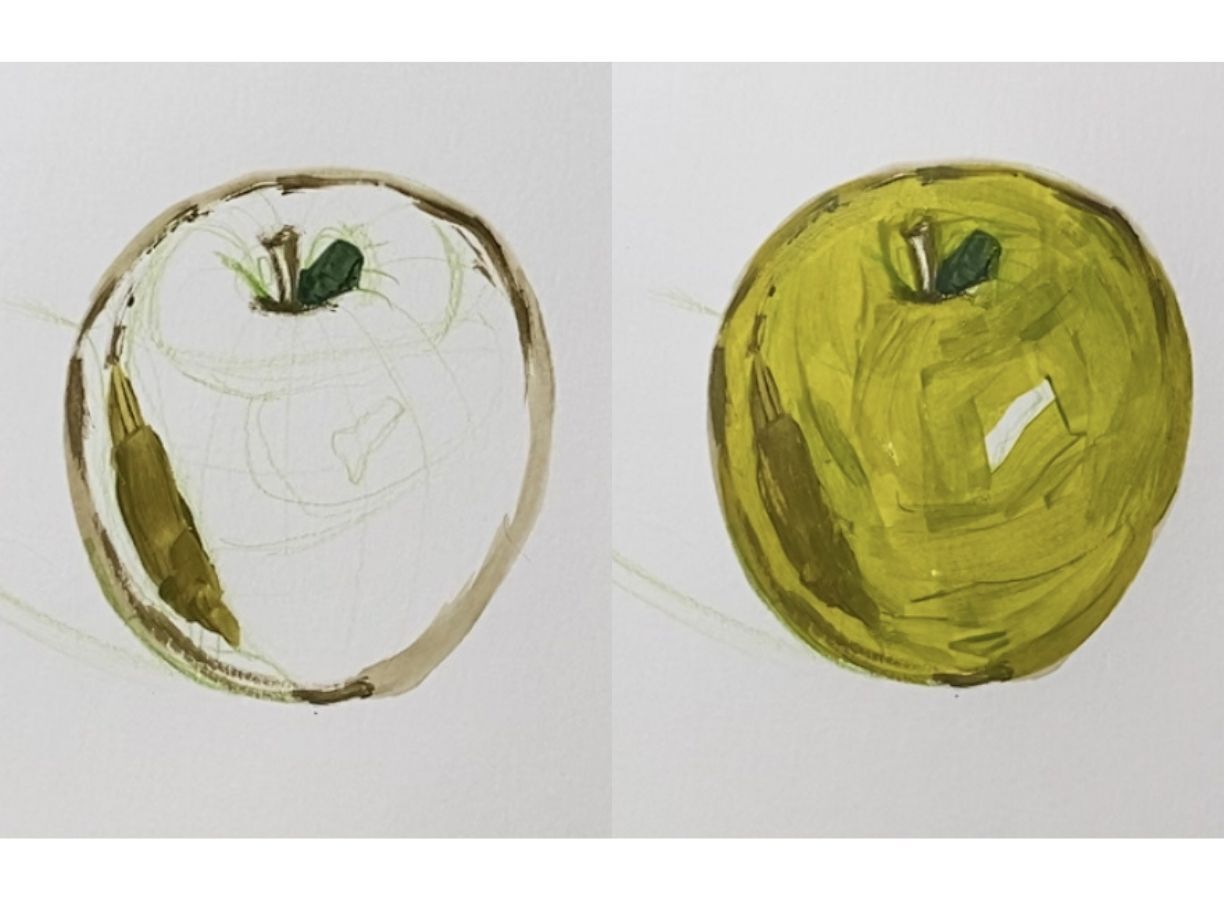
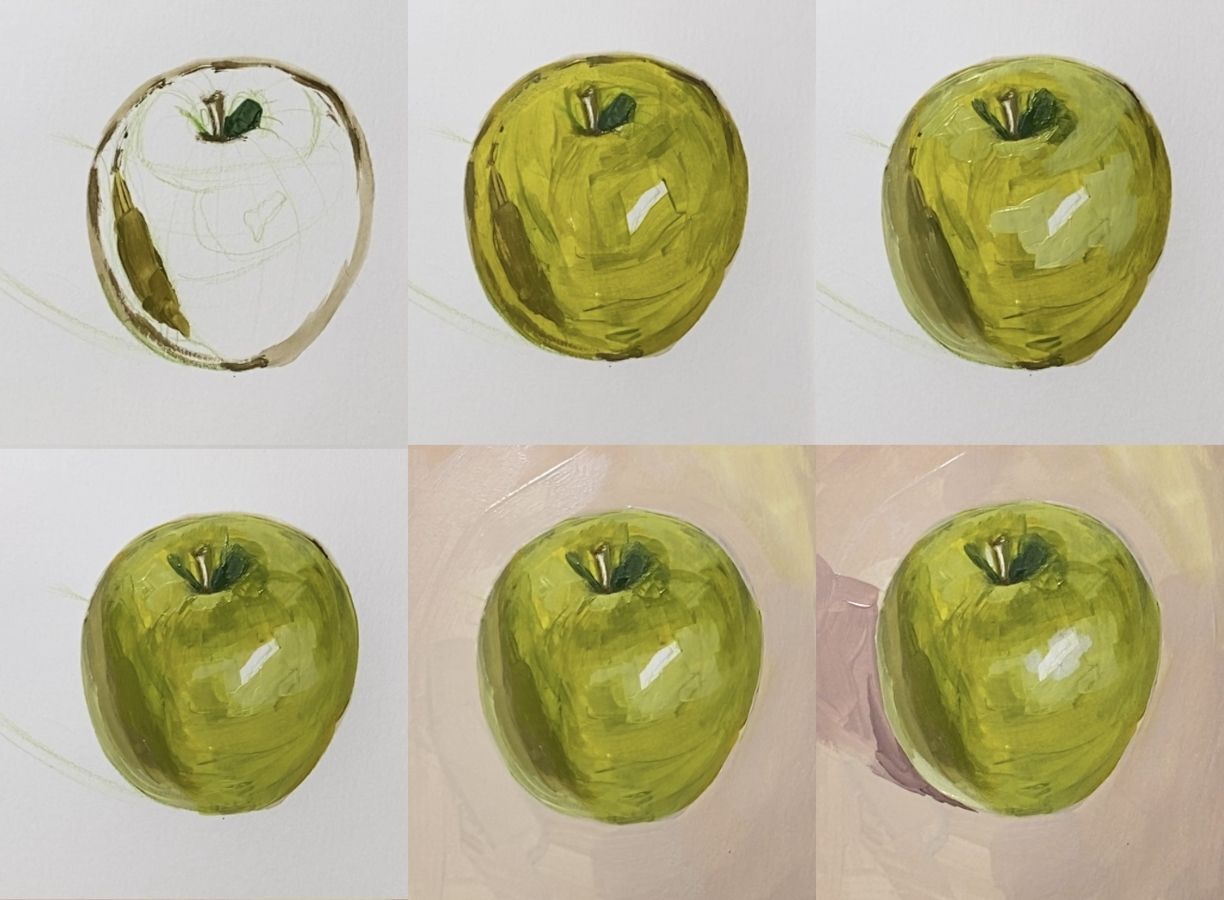
Take a clean your palette. Mix a green base color, along with various shades of it that you'll need.
Apply the green paint using the same techniques as for the red apple. Randomly add light dots where needed, starting with the areas that match most closely.
Wipe excess paint from your brush and use it to add the next darker tone. Follow with a lighter version, then paint the yellowish tone near the left edge.
Finish with a darker tone along the far left.
Continue adding the appropriate tones to complete the apple. Wipe excess paint off the brush. Use it flat to blend the colors lightly together.
Use a smaller brush to paint the top of the apple, following the reference photo. Create depth by using a lighter shade for contrast. Make sure the paint is dry before adding more layers.
With a fine liner brush, apply raw umber to the stems. Let it dry.
Use a smaller brush to paint the top of the apple, following the reference photo. Create depth by using a lighter shade for contrast. Make sure the paint is dry before adding more layers.
With a fine liner brush, apply raw umber to the stems. Let it dry.
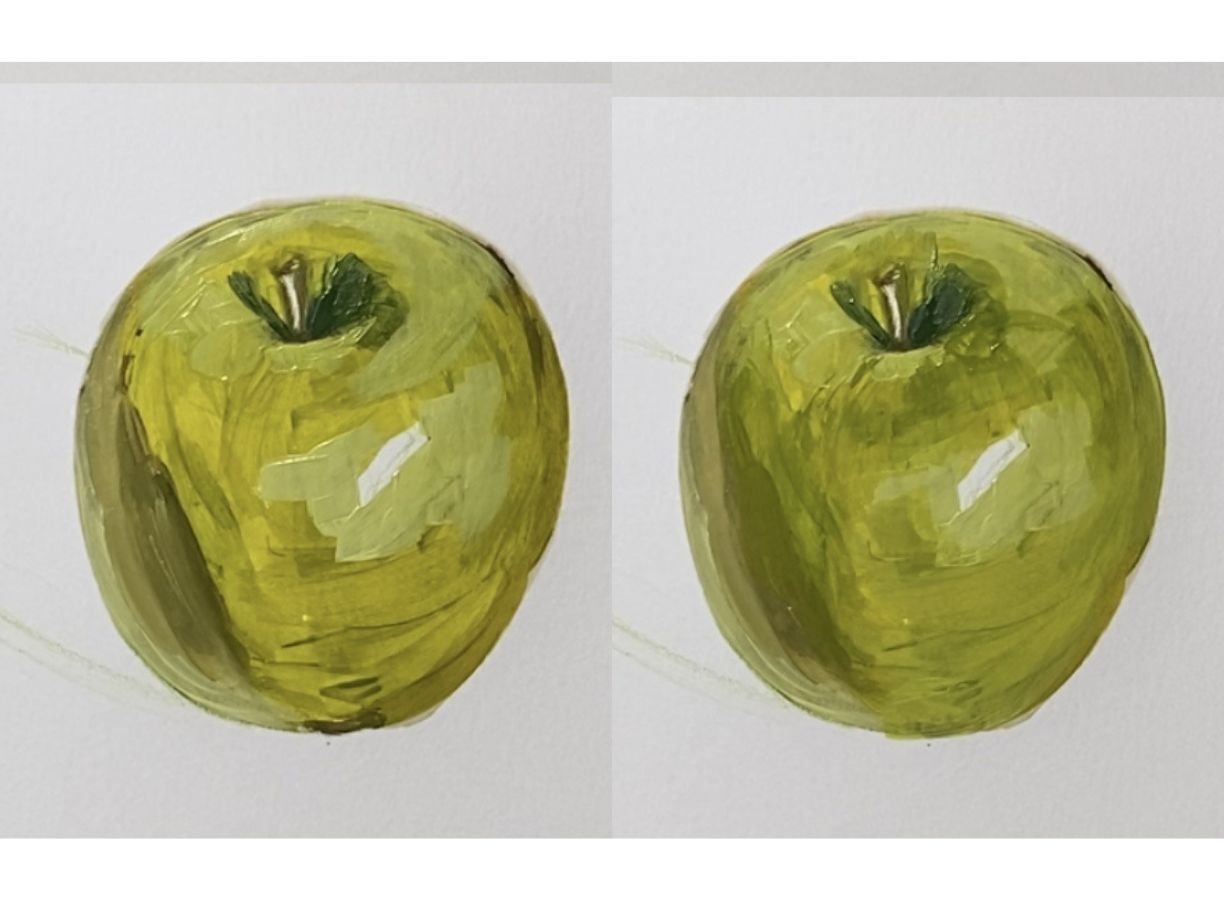
Dab on some highlights with yellow ochre.
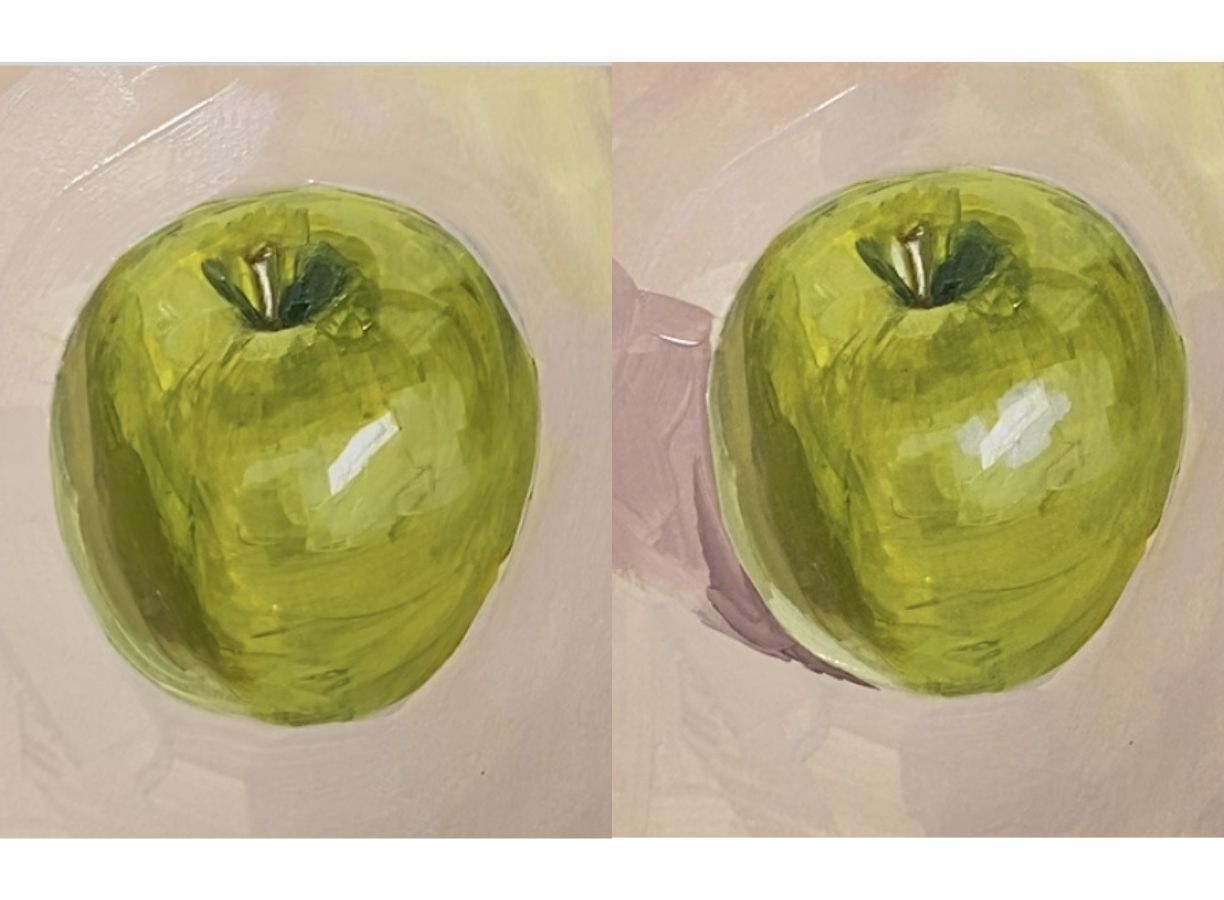
Note that the shadows cast by the apples are darker at the base and fade away. Add green to the black shadow color and paint the shadow.
Use a damp filbert brush to soften the shadows.
Note that the shadows cast by the apples are darker at the base and fade away. Add green to the black shadow color and paint the shadow.
Use a damp filbert brush to soften the shadows.
Artists have been drawing apples for years, and you might think it's because they're easy to draw. However, as you saw in our guide, it’s not always as simple as it looks! While the steps are designed to make it easier, there can still be challenges.
Here are two ways to make it simpler:
If you’re struggling with your apple sketch, don’t be afraid to simplify the details that are giving you trouble. Drawing should be fun, not stressful! You can change the shape, simplify the details, or even leave out elements like the leaf.
Here are two ways to make it simpler:
- Look up pictures of apples to help you get the shape, leaves, and stem right.
- Use a real apple as a model. Plus, you’ll have a snack ready when you’re done!
If you’re struggling with your apple sketch, don’t be afraid to simplify the details that are giving you trouble. Drawing should be fun, not stressful! You can change the shape, simplify the details, or even leave out elements like the leaf.
Want to learn more about painting with acrylics? Check out the online course from Fantasy Room for more tips and techniques!


