


Drawing the human face can be a daunting task, especially if you're just starting out. However, the nose is one of the most characteristic features of the face, and its accurate depiction can significantly enhance your art.In this article, we'll walk you through the step-by-step process of drawing a nose to create realistic colored pencil portraits.
Introduction to Nose Anatomy
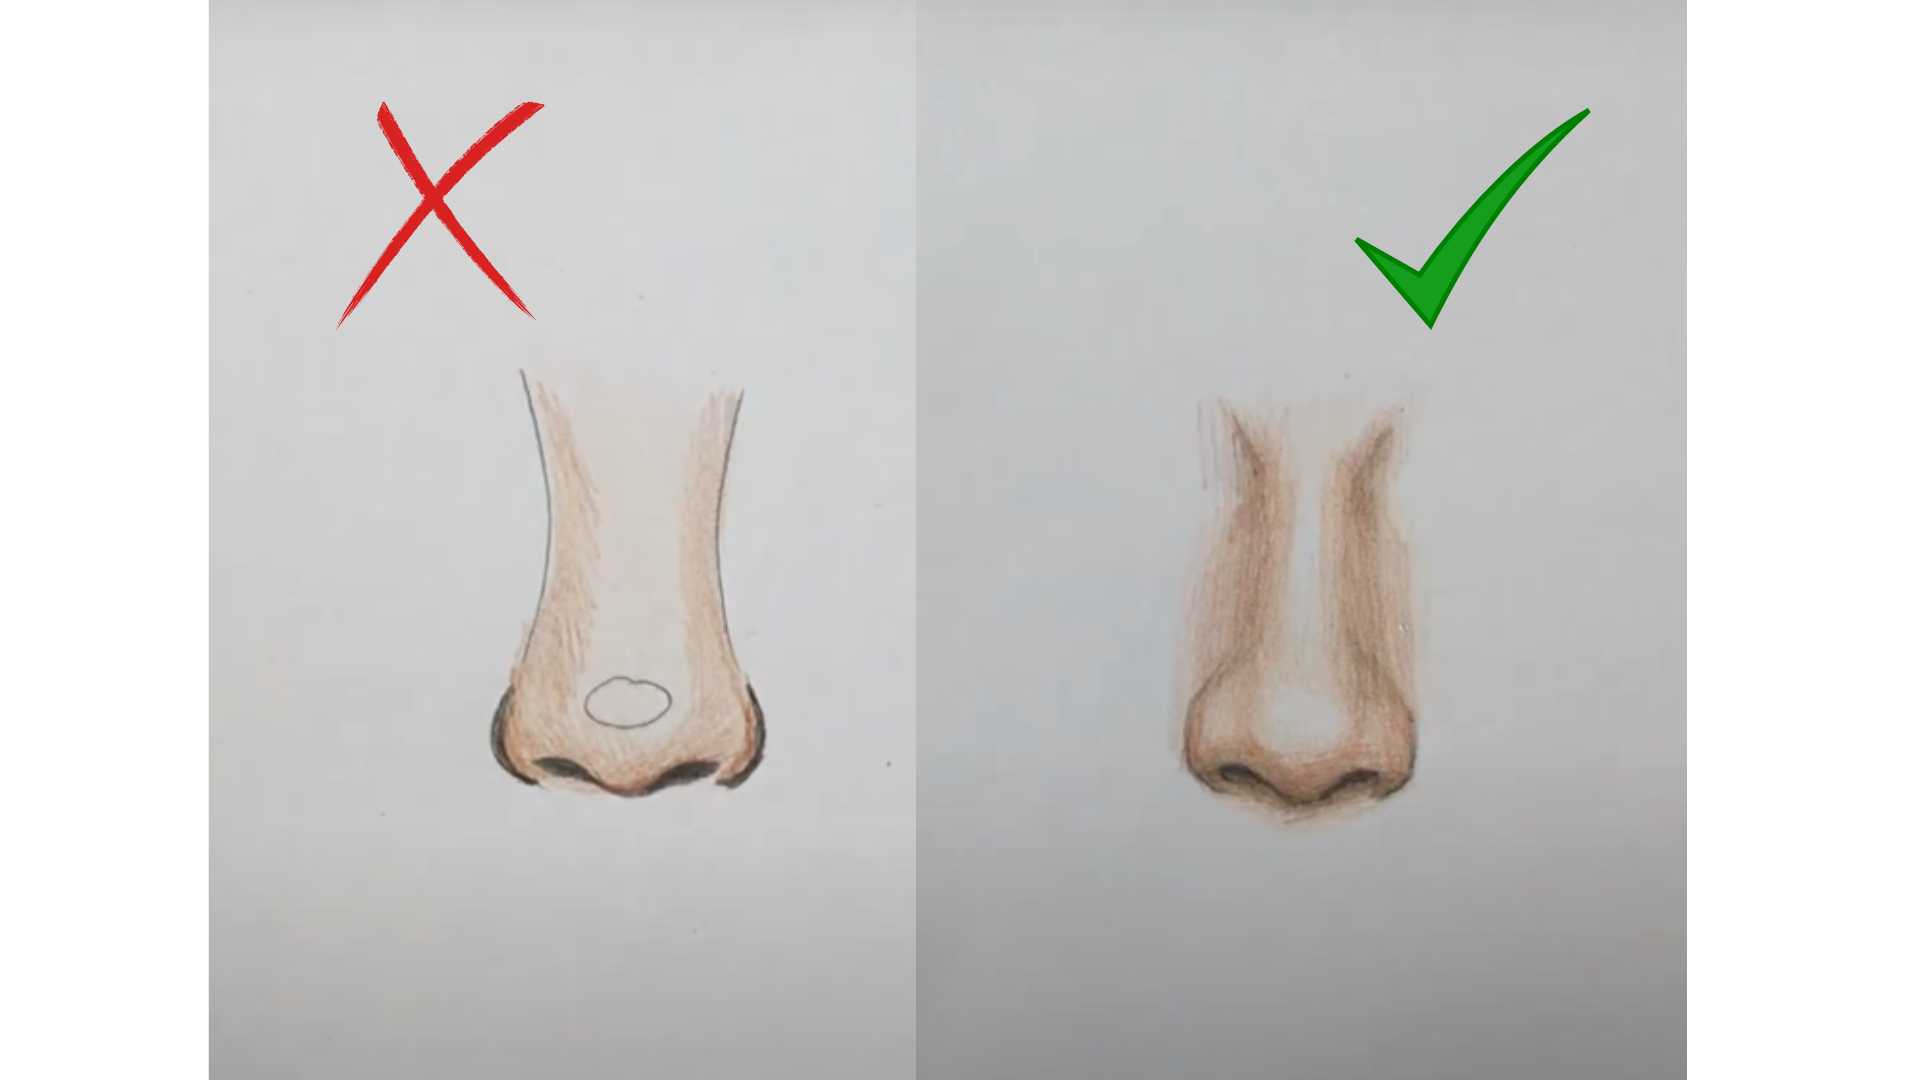
Before we begin, it's important to have a basic understanding of nose anatomy. The nose consists of several main parts: nostrils, nasal wings, nasal bridge, and tip. Understanding these basic elements will help you create a more realistic depiction.
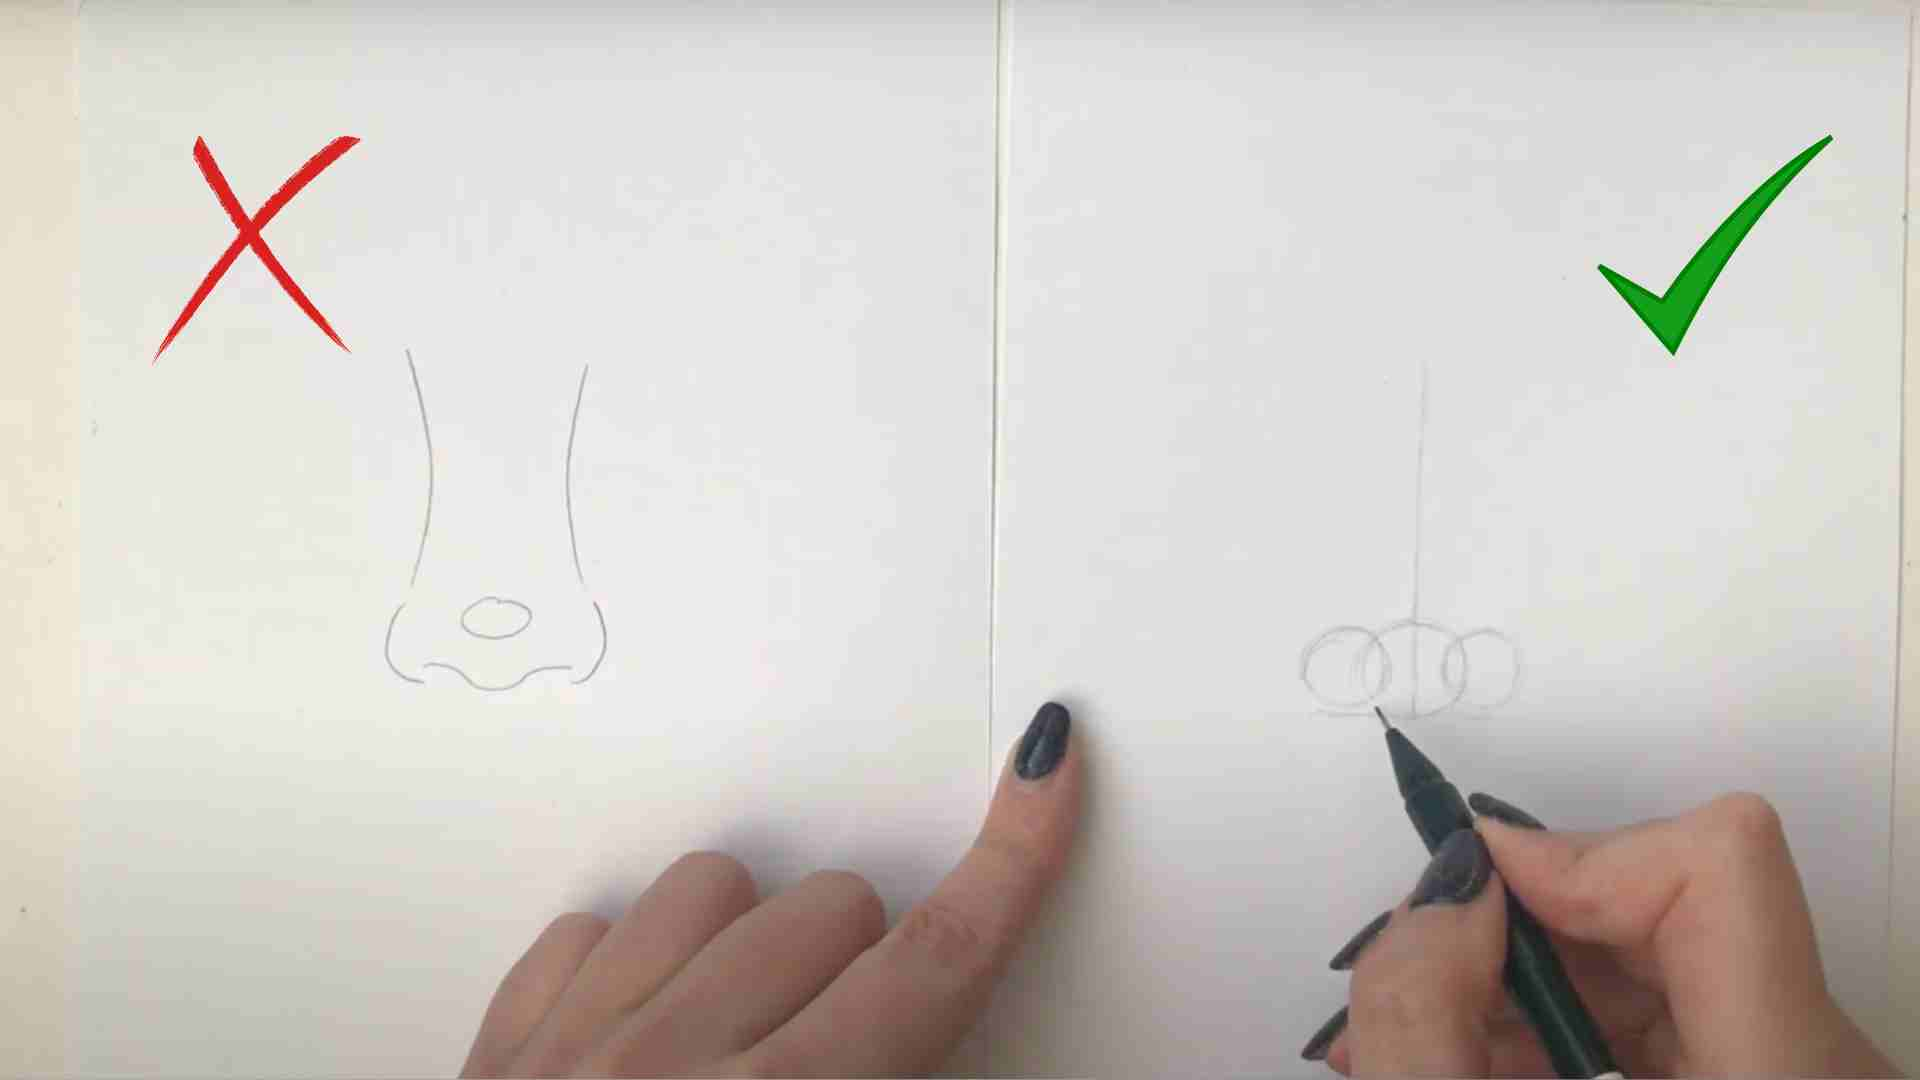
Step 1. Creating the Nose Base
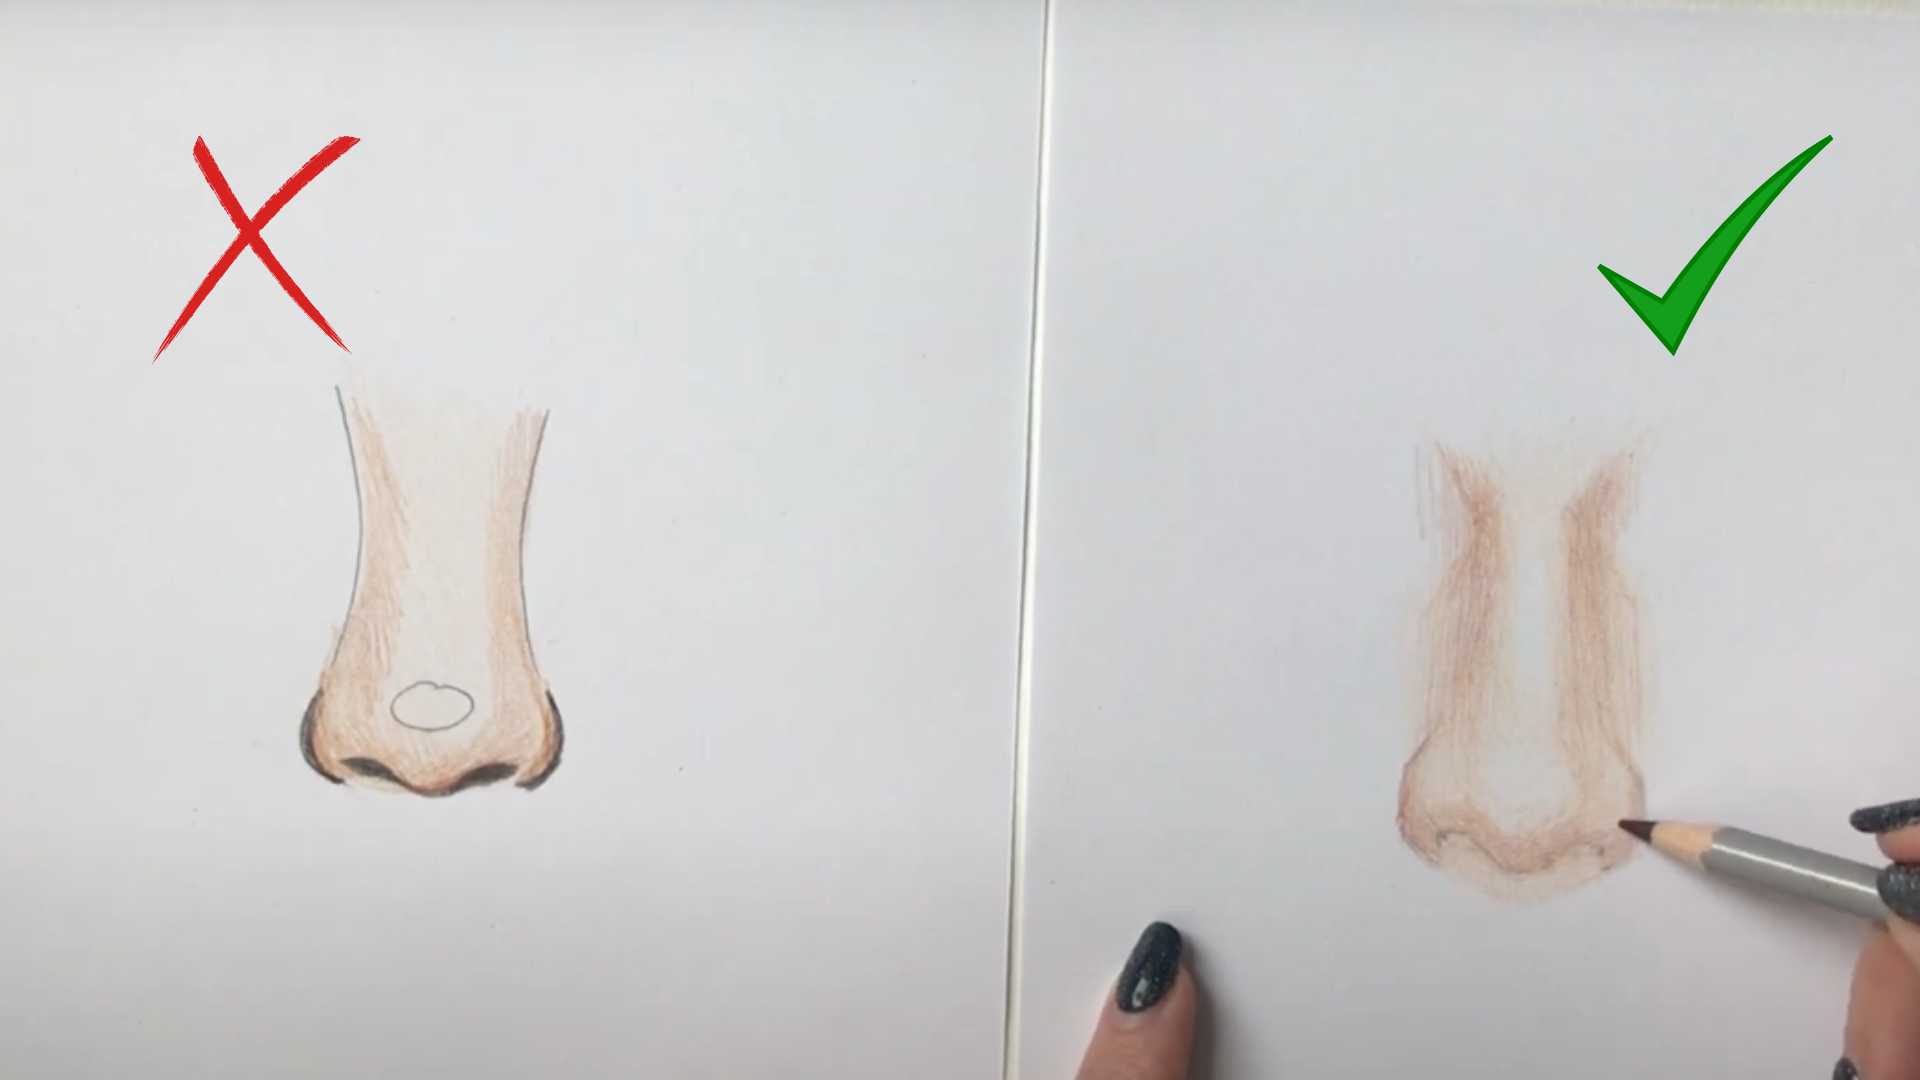
Let's start by creating the base of the nose. On a clean sheet of paper, draw three bumps and a line to form the overall shape of the nose. Remember, at this stage, it's important not to apply too much pressure with the pencil, making it easy to erase lines if needed.
Step 2. Drawing Nostrils and Nasal Wings
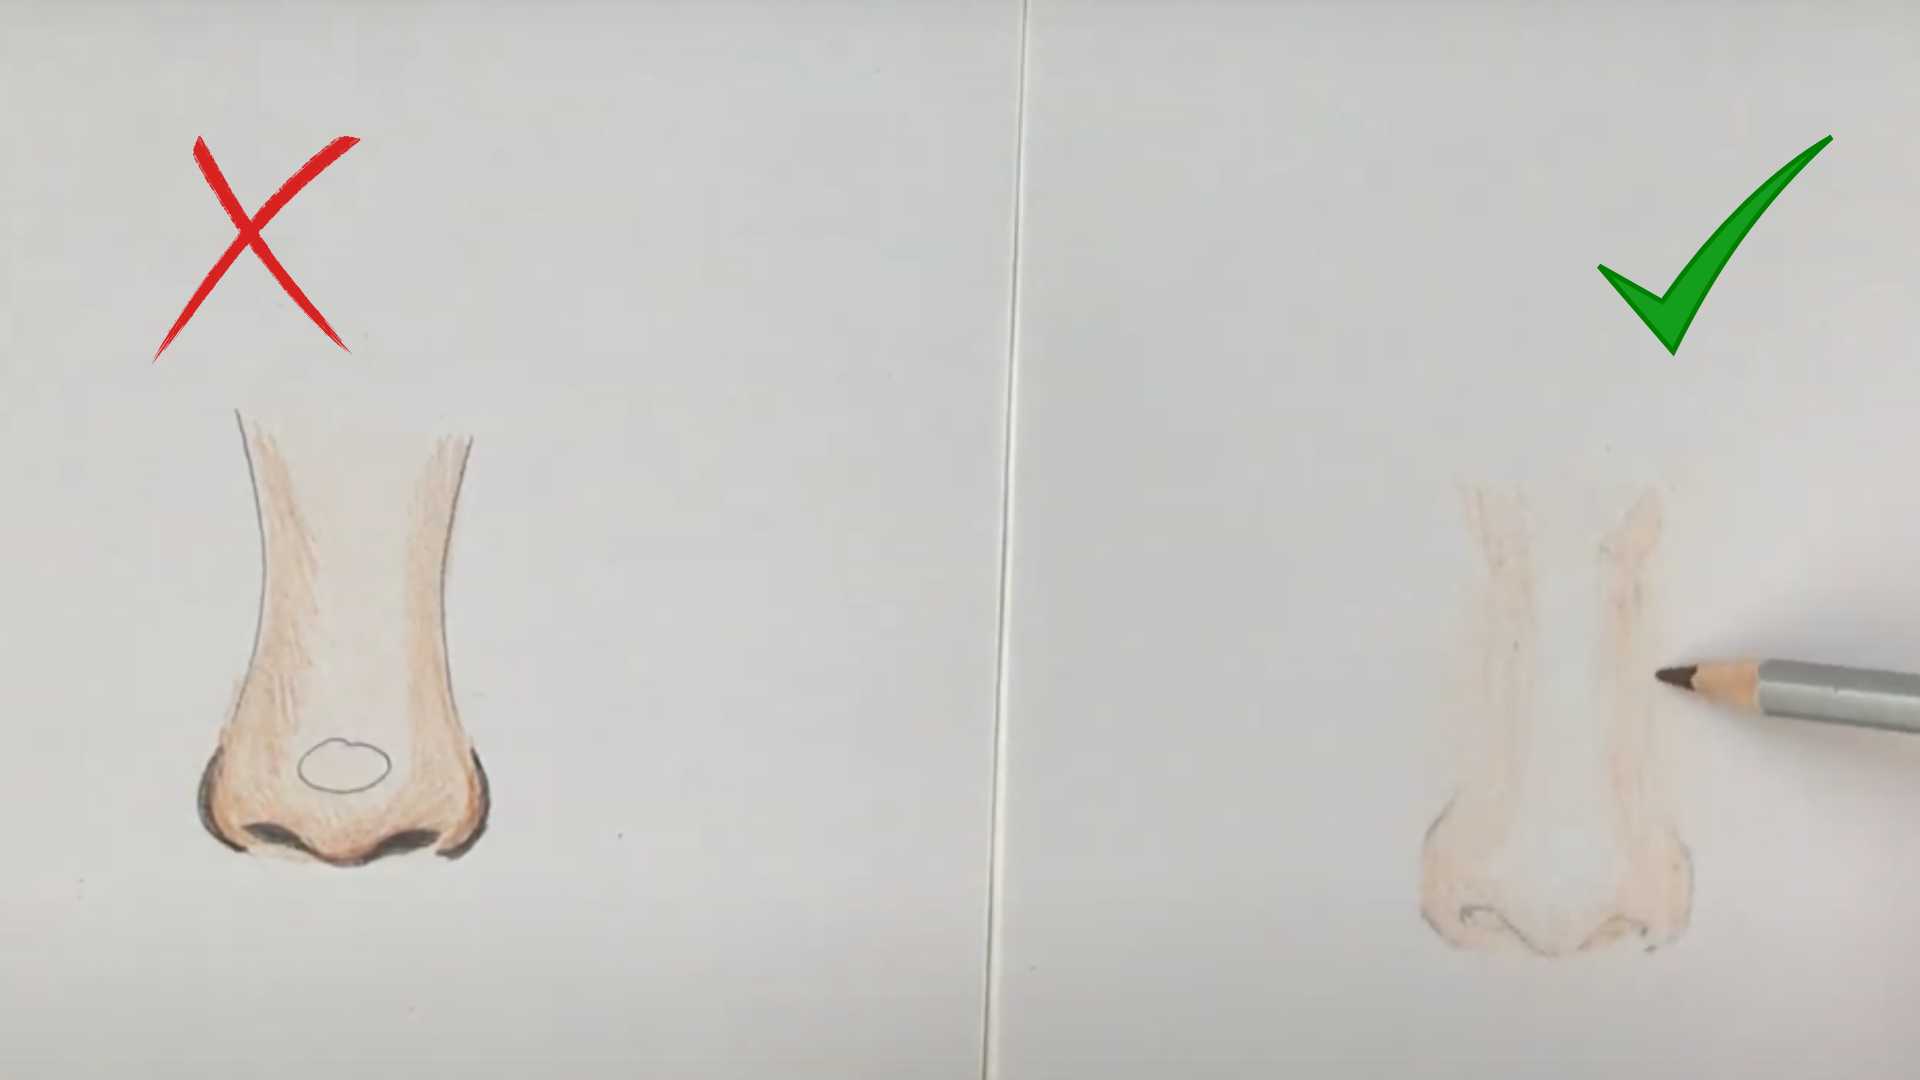
After creating the base, you can move on to drawing nostrils and nasal wings. Determine their shape and size and carefully draw them in accordance with the overall structure of the nose.
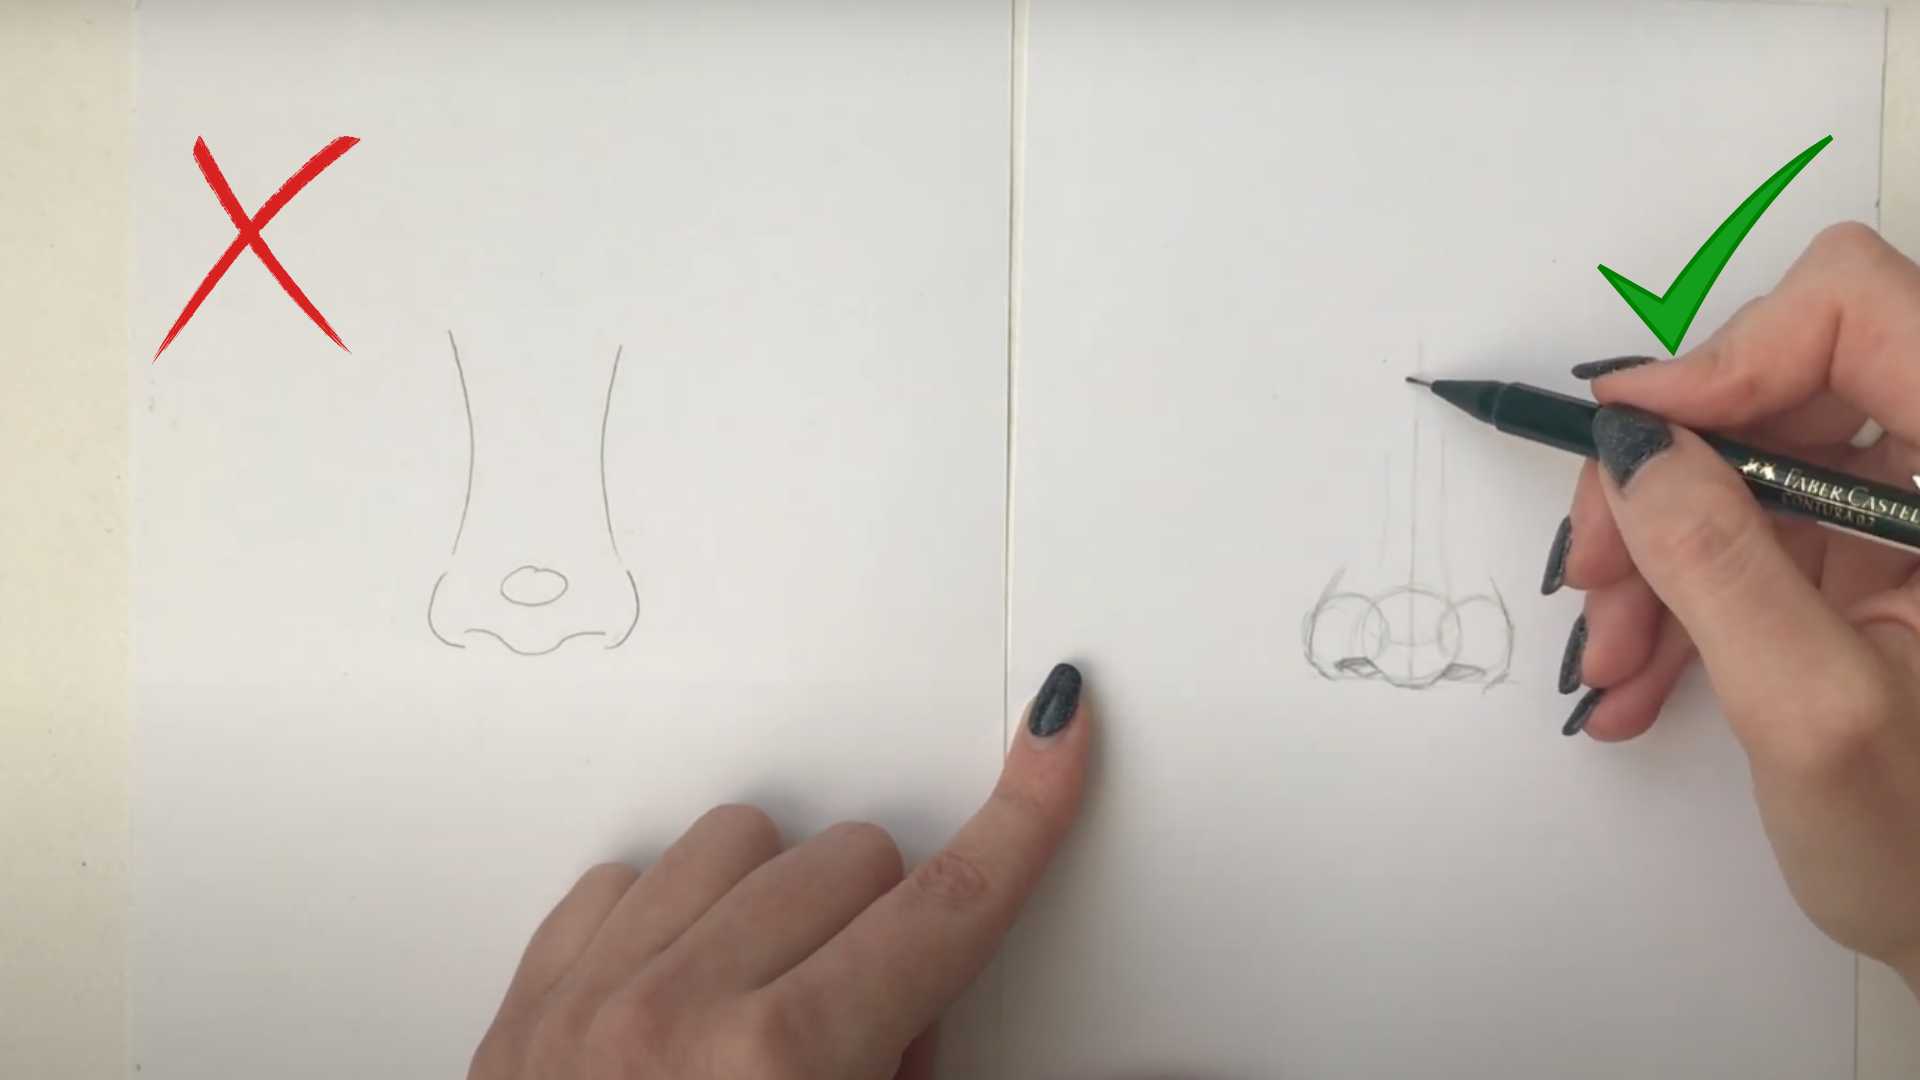
Step 3. Drawing the Nasal Bridge
Now, draw the nasal bridge, forming a trapezoid. This will give the nose a more voluminous appearance and help create a natural shape.

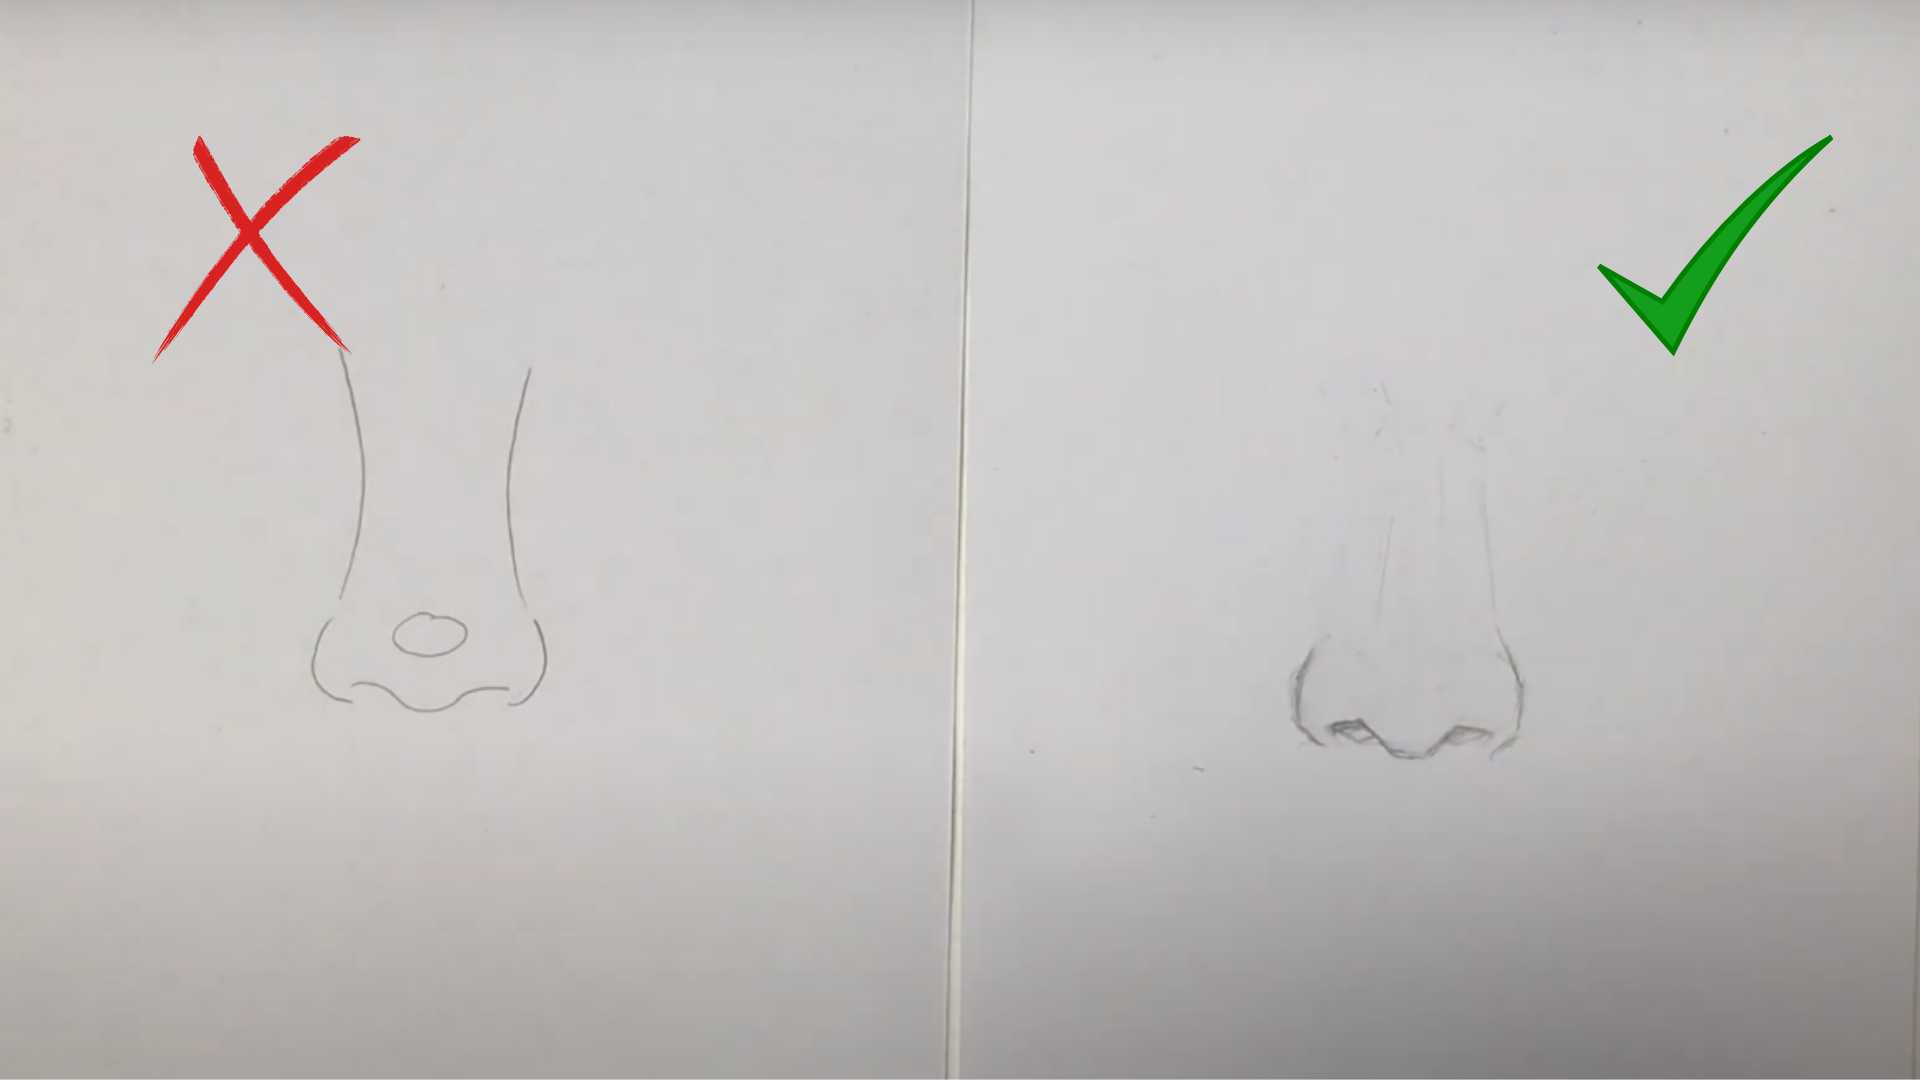
Step 4. Erasing Excess Lines
Once the basic features of the nose are drawn, carefully erase excess lines, leaving only those needed for the overall contour of the nose.
Step 5. Shading with Pencils
Let's move on to shading the nose with pencils. Do not press too hard on the pencil and shade in one direction. This will help create a more realistic skin appearance on the nose.

Dive into the world of fashion and art with our Fashion Portrait in Colored Pencils course! Learn how to create unique portraits with striking looks and stylish outfits. Learn how to work with lighting, facial expressions and composition to make your work captivating and eye-catching inspired others.
Step 6. Adding Shadows
Hatch shadows in one direction to create volume. Then fully shade the nasal wings, making them darker than the rest of the nose.
Create a gradient by drawing and blending shadows at the top of the nose. This will help create a more natural transition from light to shadow.
Create a gradient by drawing and blending shadows at the top of the nose. This will help create a more natural transition from light to shadow.
Add shadow under the nose tip and on the nose itself to give it depth and volume.
Step 7. Finishing the Drawing
Using a dark brown pencil, add more shadows along the contour of the nose to give it more depth and realism.
Finally, draw the nostrils, completing the nose image. Review the drawing and make necessary corrections to create the best result.

Drawing a nose may seem like a daunting task at first glance, but with practice and a sequence of steps, you can achieve stunning results. Don't be afraid to experiment with different techniques and styles, and remember that practice makes perfect. Good luck with your creativity!


