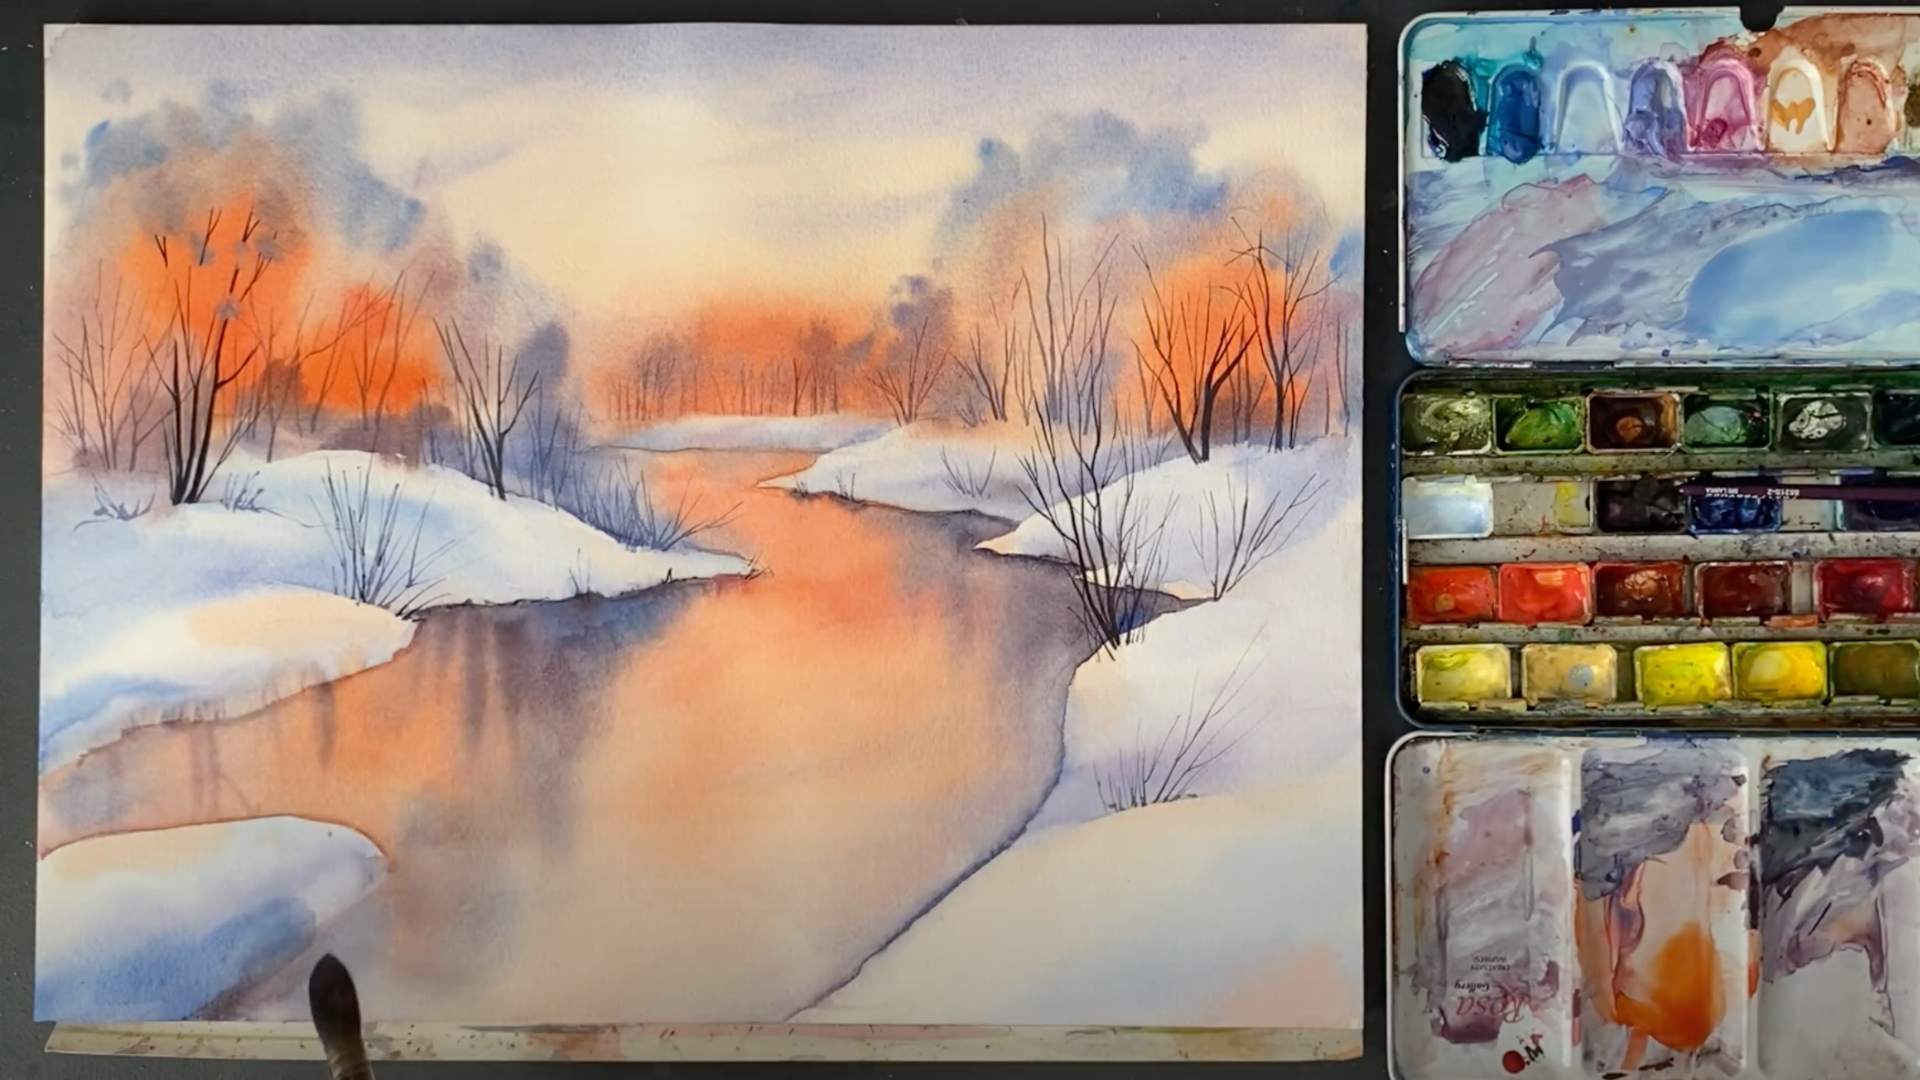
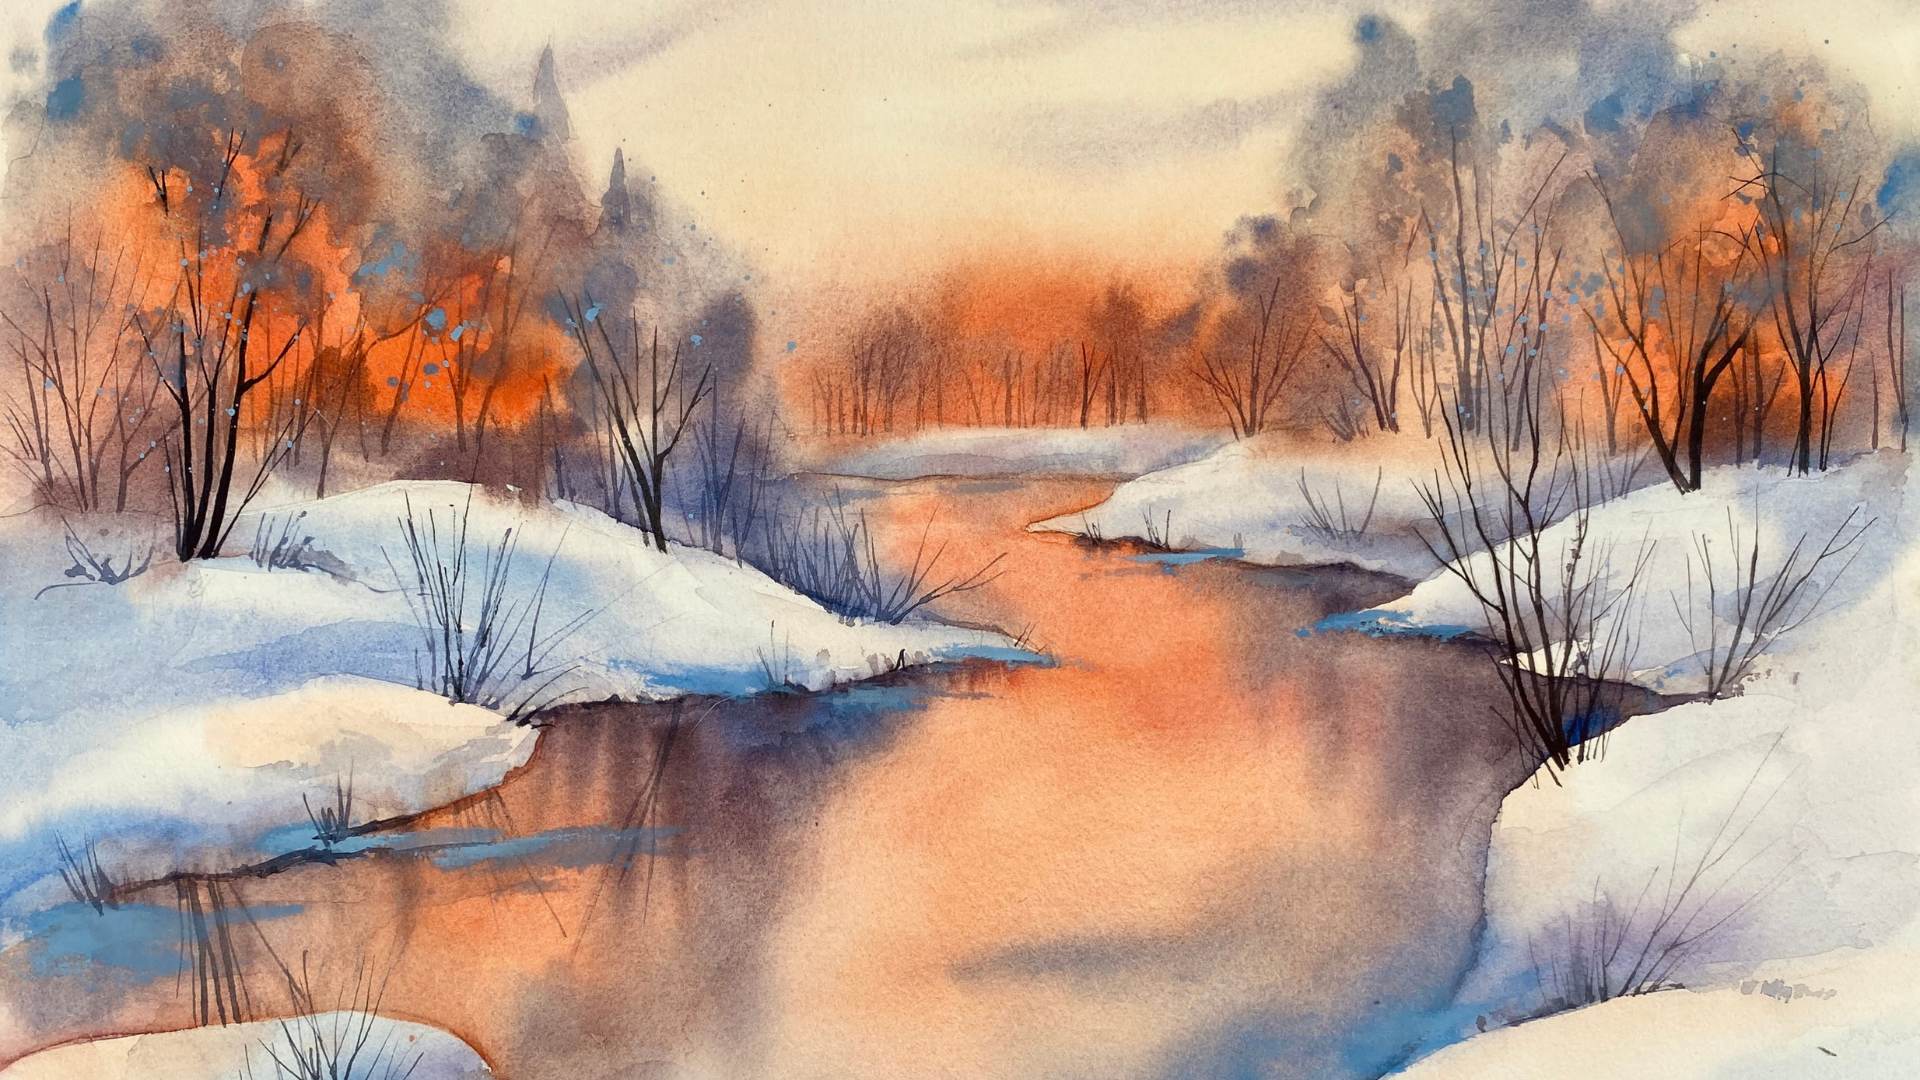
Winter is a enchanting season, where the world is draped in white and silence. Everything appears to freeze, awaiting the arrival of spring and warmth. Nature is in slumber, while inside homes, a warm, cozy light emanates, enveloping families gathered around a holiday table. Crafting a winter landscape on canvas is an excellent means of preserving this beauty, and opting for watercolors proves to be one of the finest choices. Let's delve into the essential stages of this creative process.
Step 1. Setting Up Your Workspace
To create a winter scene step by step, begin by gathering all the necessary materials. For the task, you'll need:
When selecting paints, it's crucial not only to consider their quality but also to pick a palette that aligns with the anticipated outcome.
- Watercolor paper
- Regular pencil and eraser
- Brushes in different sizes and shapes
- Paint
- A container for rinsing brushes
- Dry cloth or napkin
When selecting paints, it's crucial not only to consider their quality but also to pick a palette that aligns with the anticipated outcome.
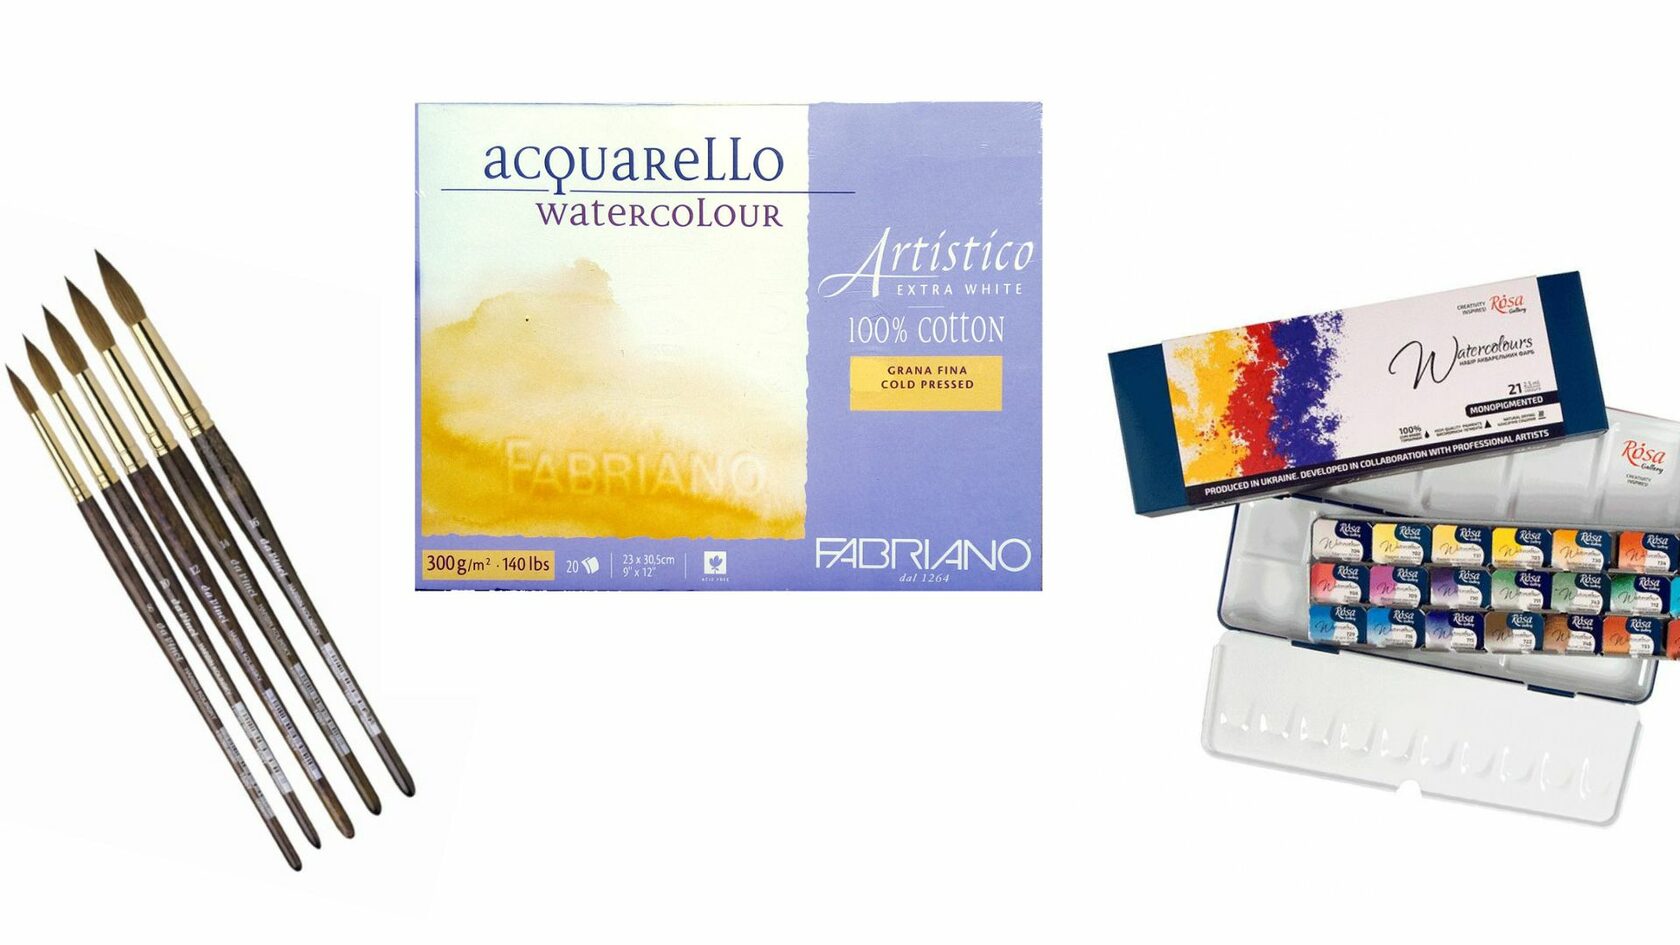
Among the brushes, it's advisable to have a wide, round, soft brush, a medium-sized brush (size 7) with a fine tip, a thin brush for intricate details, and a brush with an elongated bristle for creating long, thin lines.
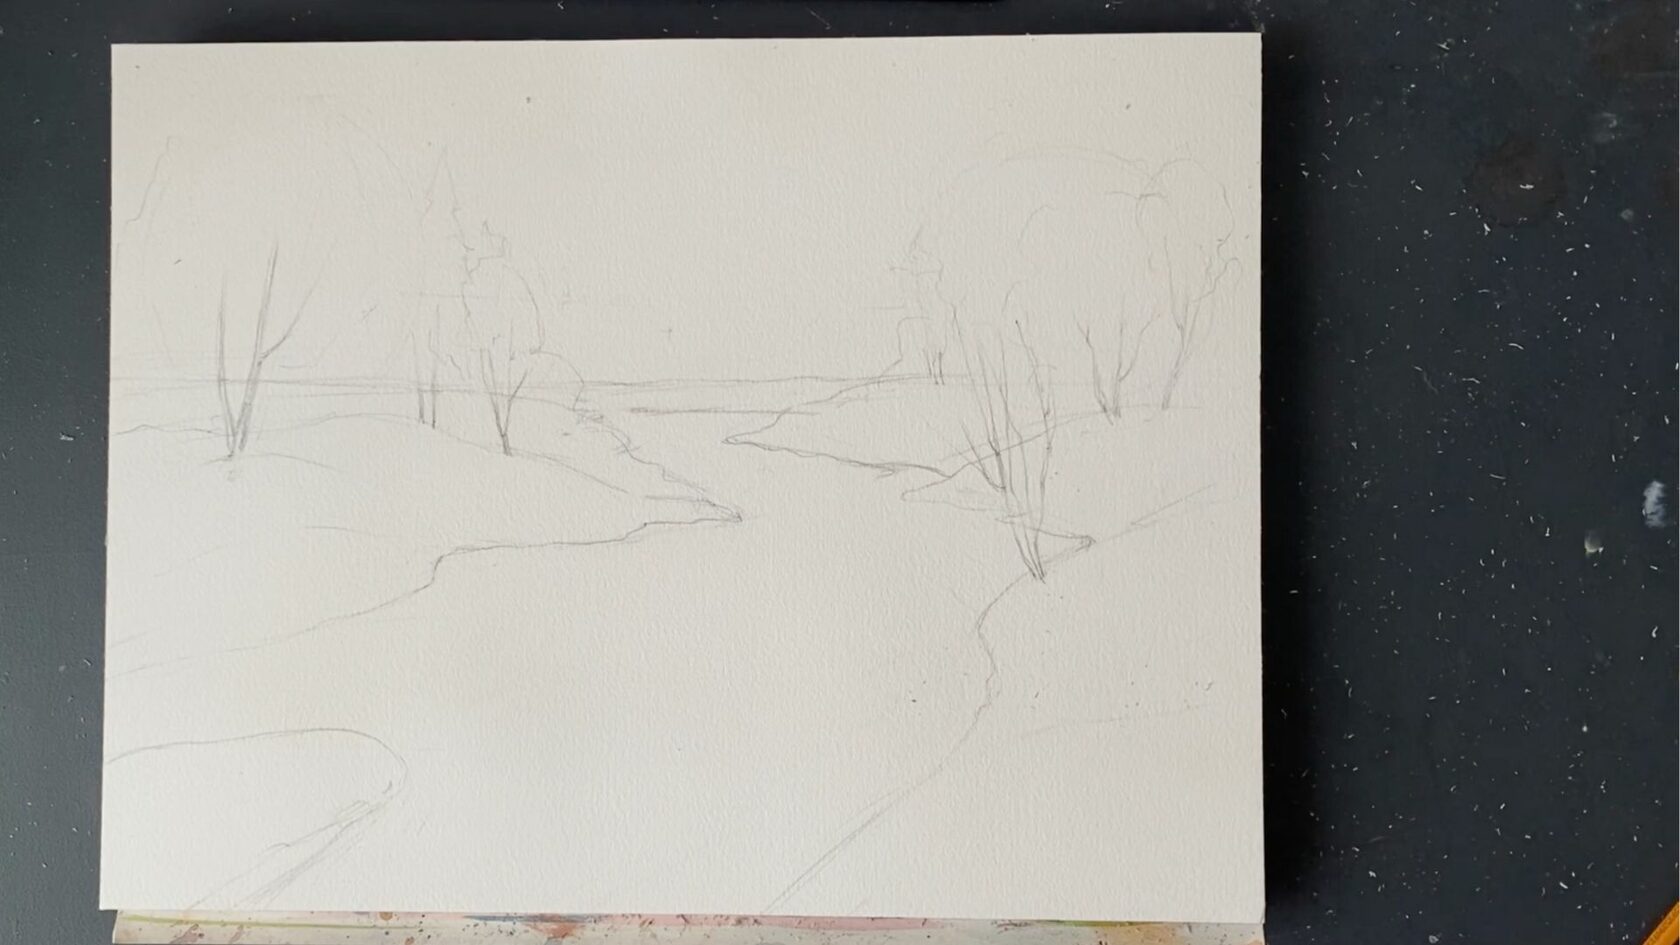
Step 2. Preparing the Reference
Winter in watercolor is incredibly ethereal and mysterious. To successfully capture its essence, it's crucial to select a reference wisely. You can utilize existing paintings as examples or choose a photo of a winter landscape that resonates with your artistic vision.
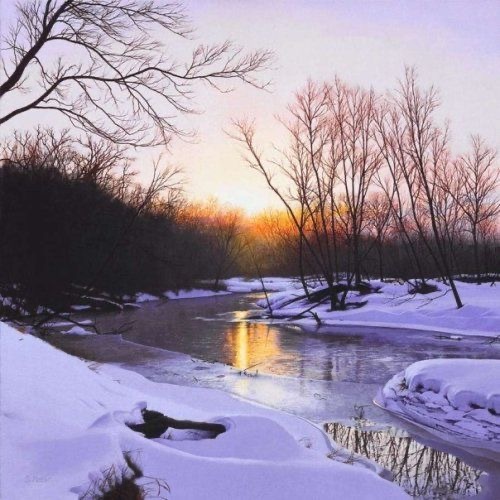
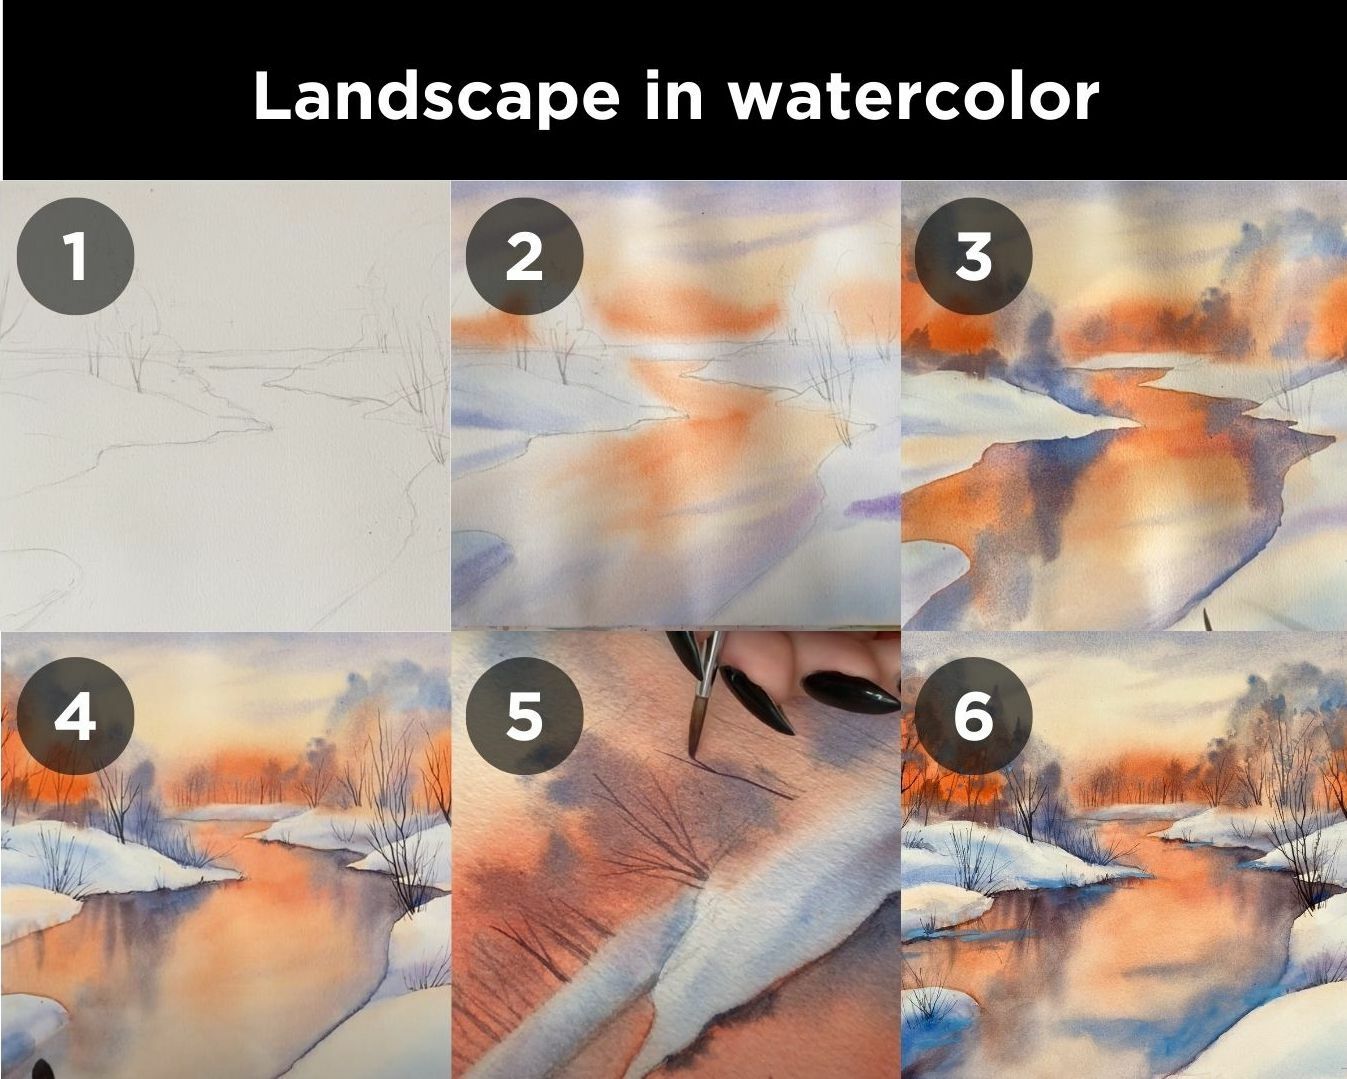
Before diving into watercolor work, take the time to sketch the image you prefer using a basic pencil. This initial sketch aids in accurately placing objects within the composition, and any necessary adjustments can be easily made with the help of an eraser during this stage.
Step 3. Background and sky
Now, it's time to begin the painting process. If you're looking to grasp the fundamentals of watercolor painting and learn how to create a picturesque winter landscape, consider enrolling in a basic course focused on painting landscapes with watercolors. Even with the basics, you'll acquire the skills to adeptly blend colors and apply shades to the canvas, achieving the desired effect.
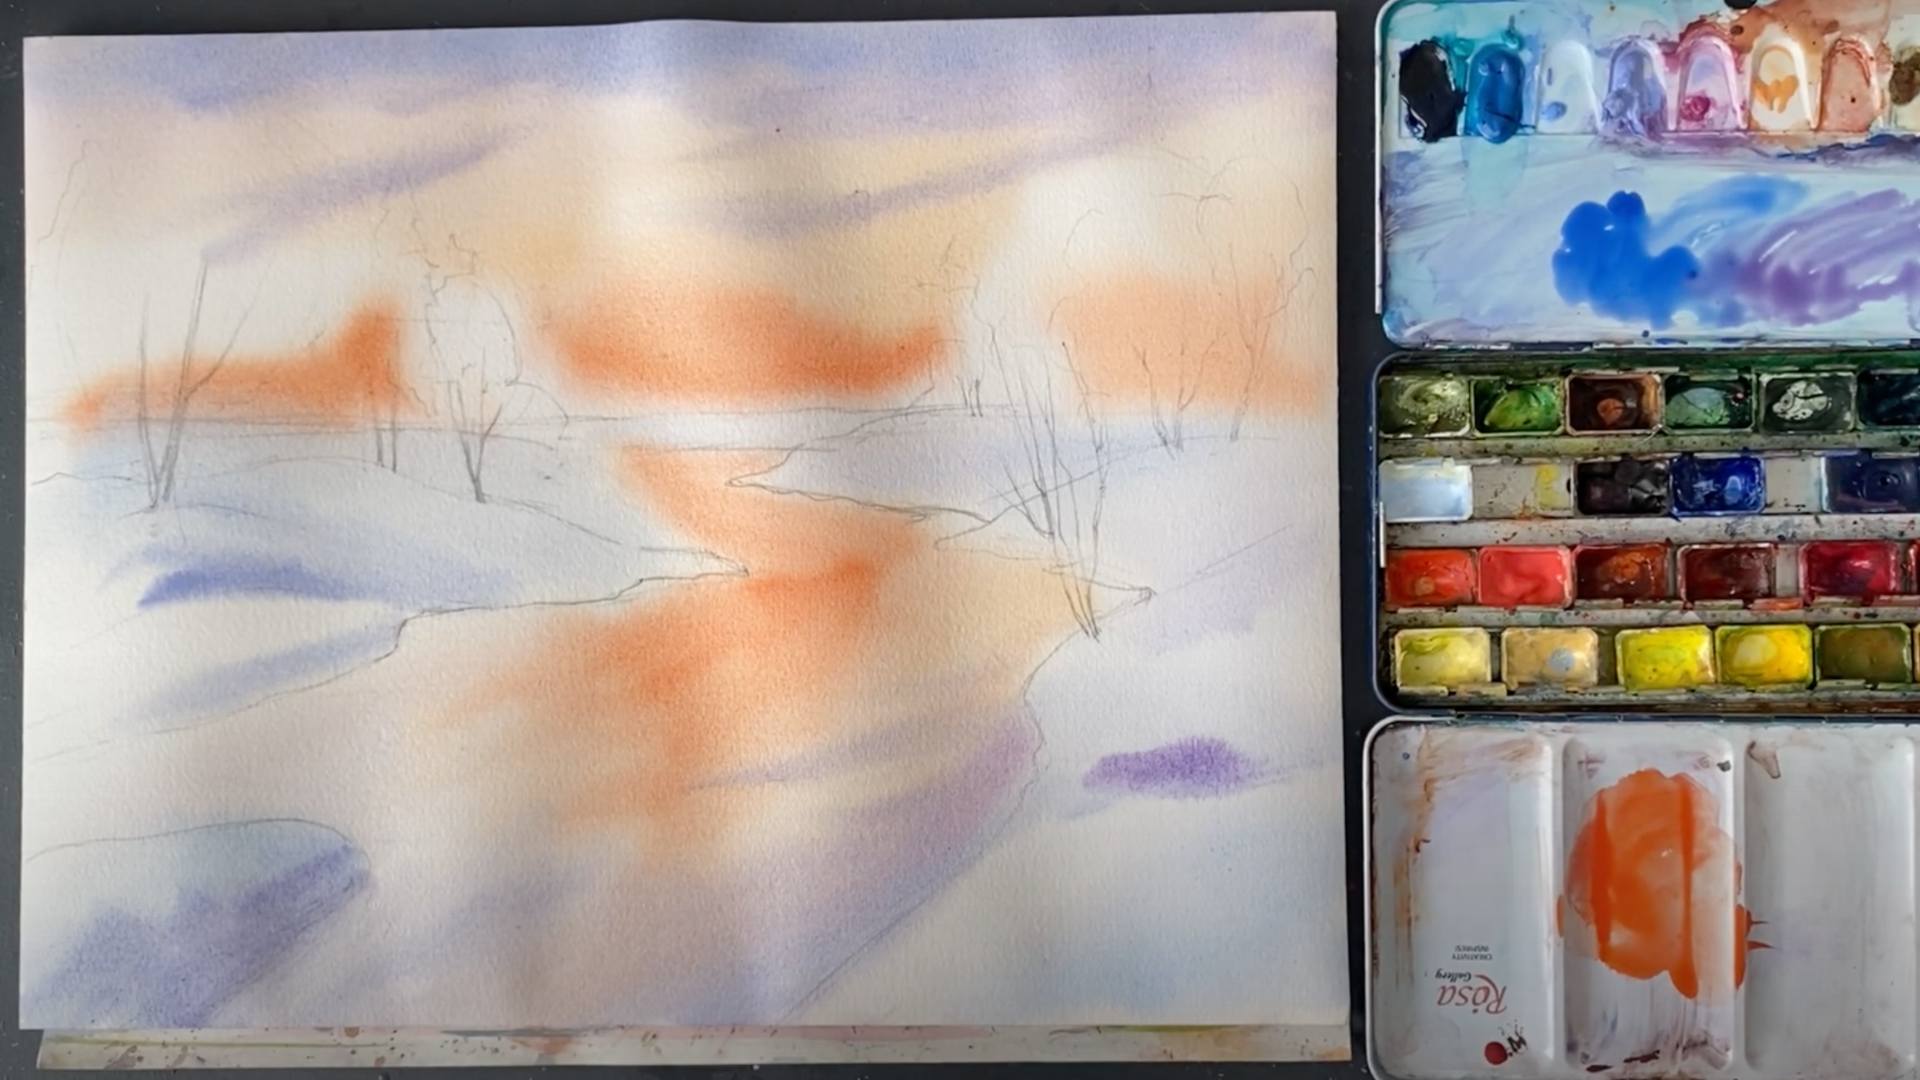
To depict the winter sky, utilize a palette of light blue and pink tones, arranging the colors from top to bottom to achieve a realistic transition effect. In this phase, introduce background elements such as hills, trees, and distant buildings, using gray-blue shades for their portrayal.
Step 4. Winter forest
Typically, winter landscapes evoke images of forests. An integral element is the depiction of trees, with a focal point being a watercolor Christmas tree. Opt for darker shades of green for the needle details, and use shades of blue and purple for creating shadows.
Don't overlook the significance of snow-covered branches. Snow not only falls on the branches, adding an extra tone, but it also alters the shape of the Christmas tree itself, as the branches bend under the weight of the snow cover.
Step 5. Drawing snow with watercolor
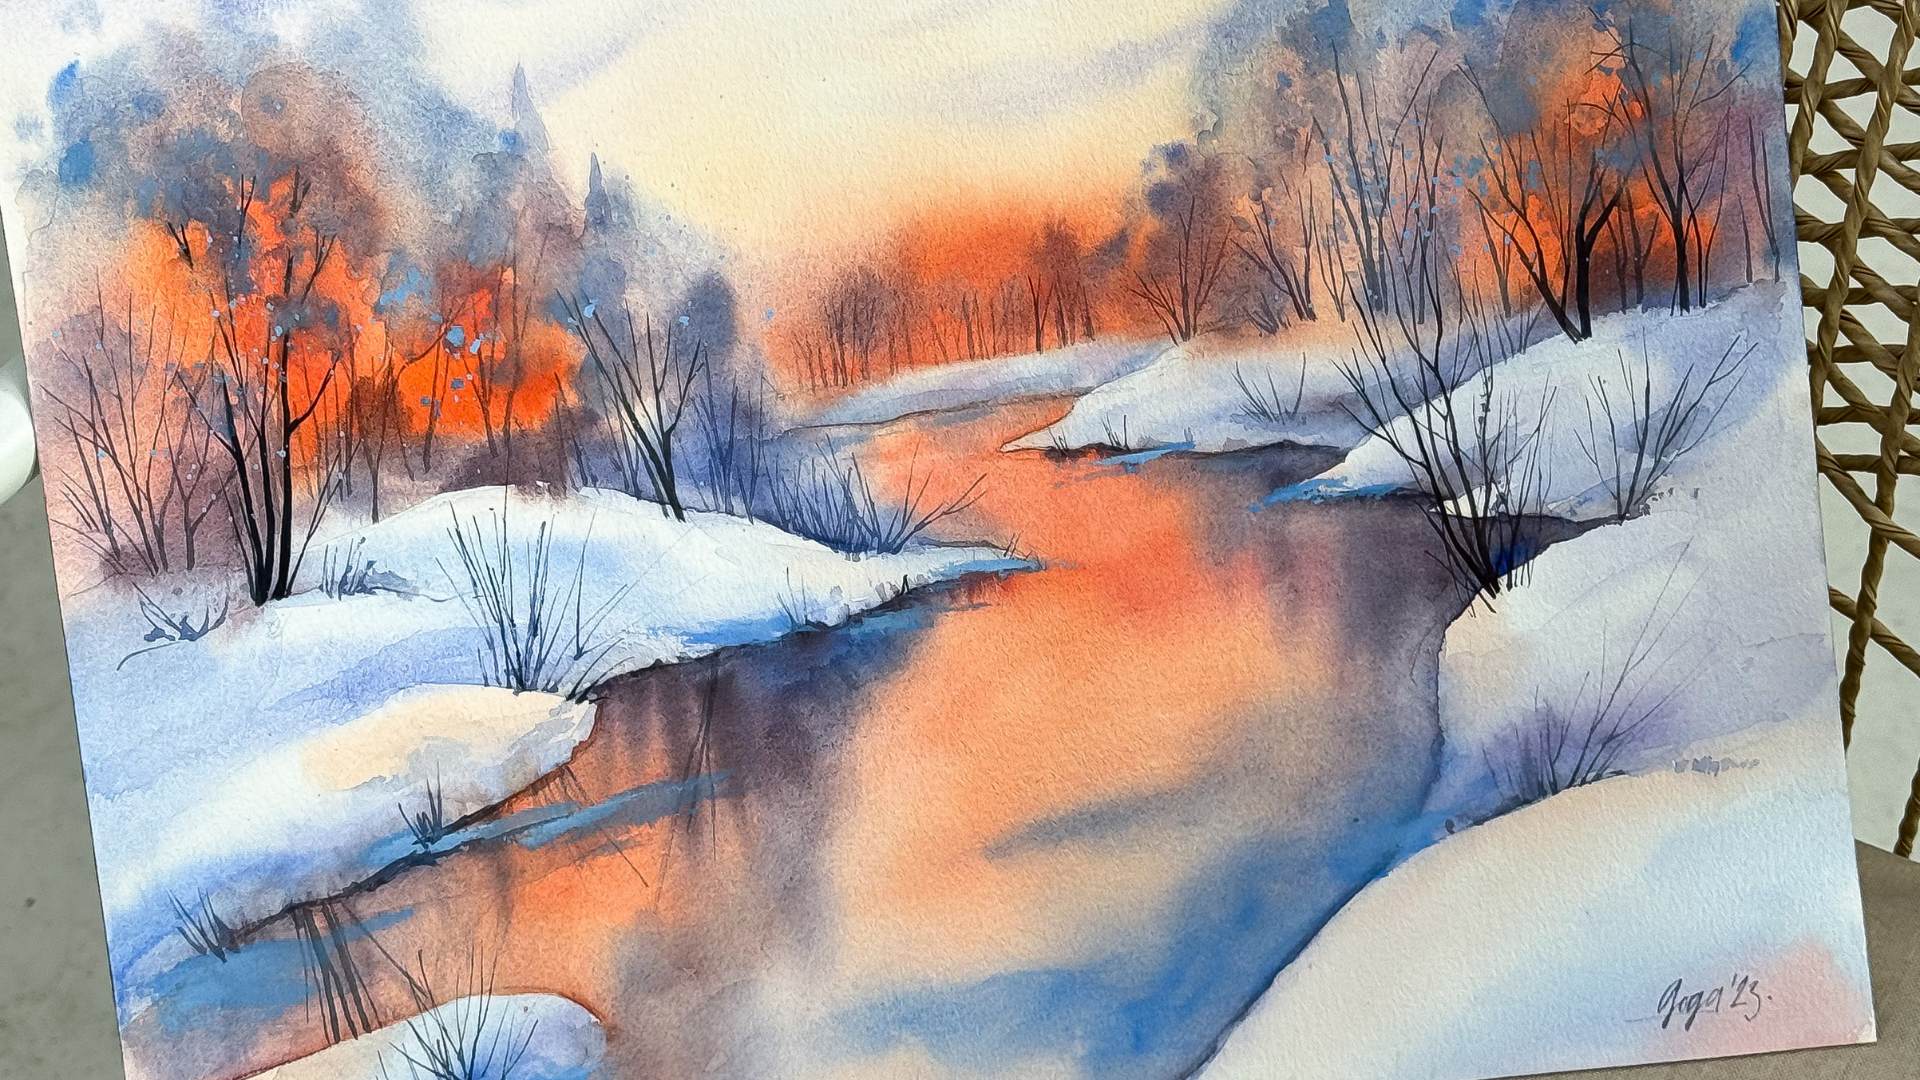
Evidently, the quintessential element of a winter landscape is snow. To render it most realistically, selecting appropriate shades is crucial. White, gray, lavender, and blue colors work well.
To depict snow with watercolors, employ the wet-on-wet technique. Begin by dampening the paper with a wet, clean brush and then apply paints, allowing them to spread and blend.
Bright white can be used to highlight areas where light falls, and shadows can be incorporated at this stage. For added texture, consider sprinkling salt on the wet painting.
Add tracks, snow, and other elements only after the paper is completely dry to prevent unintended spreading. Employ the splatter technique to incorporate falling snow onto the painting.
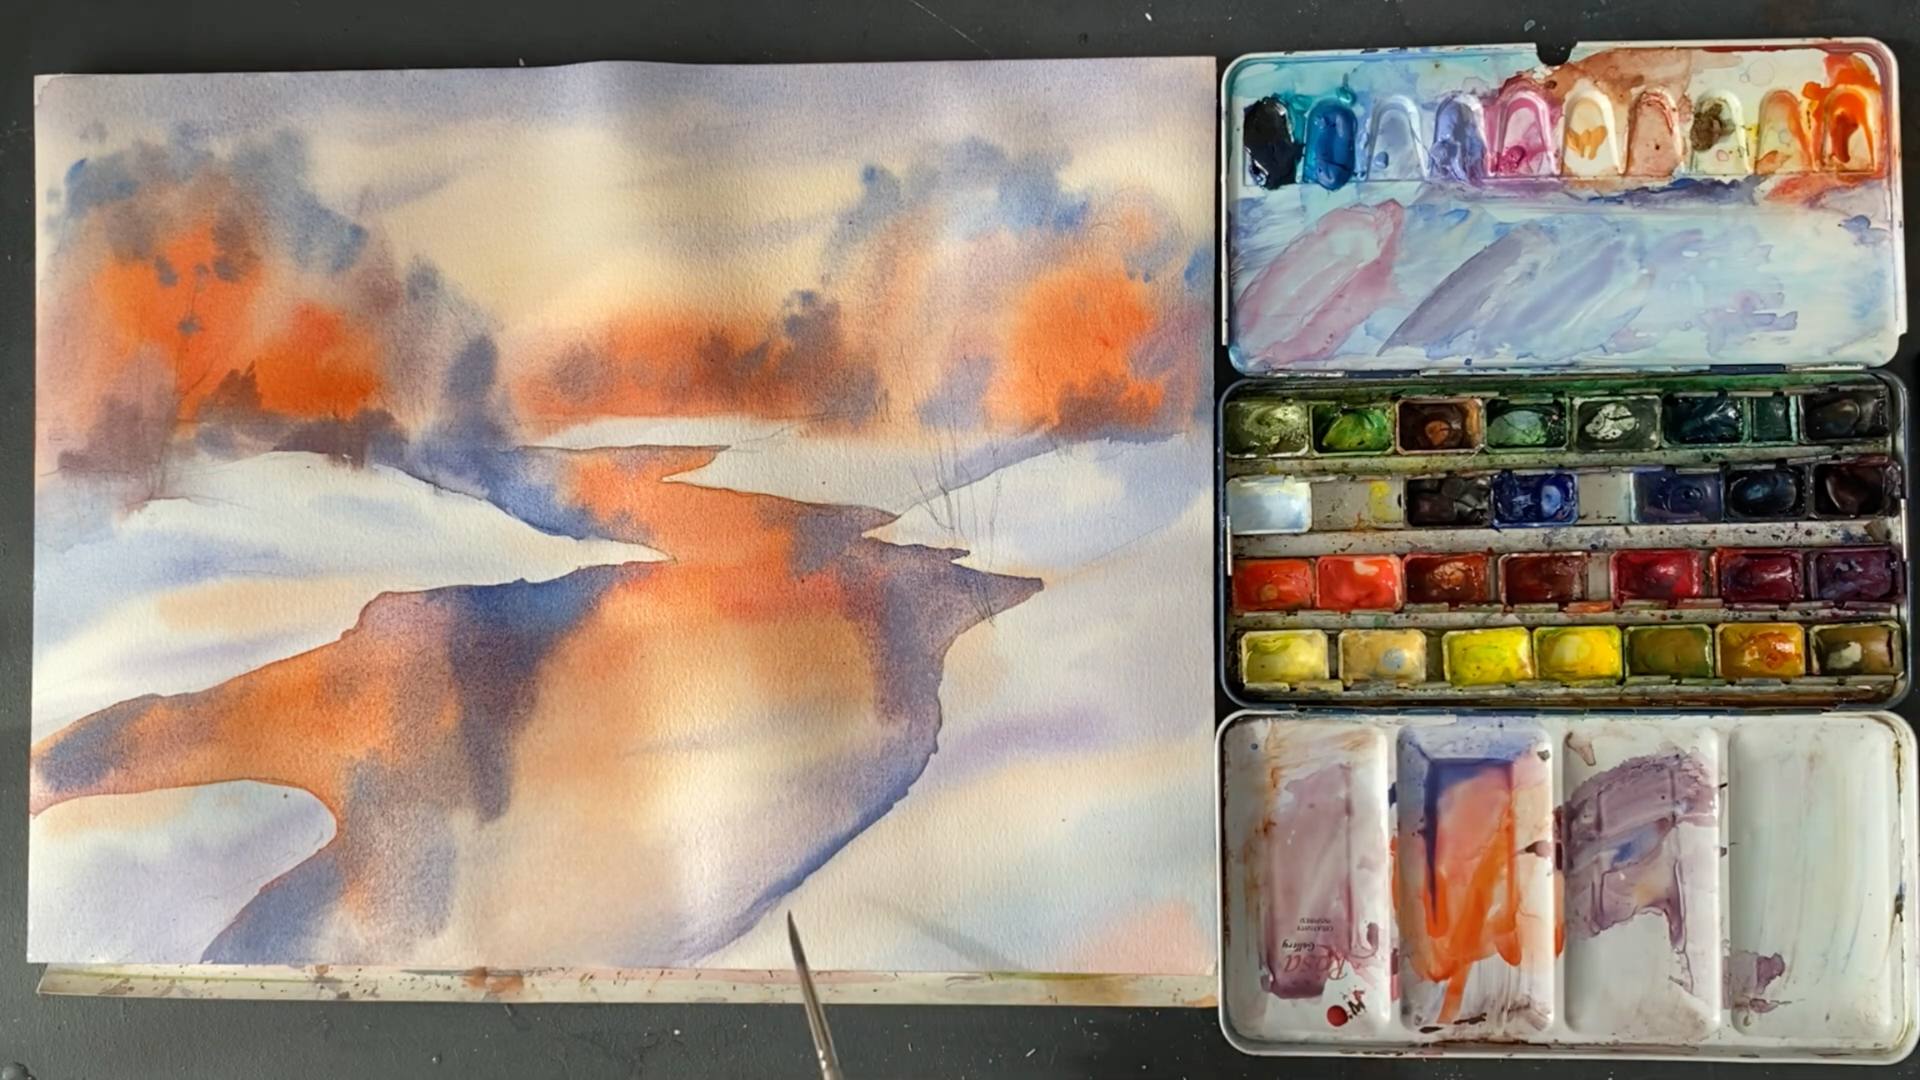
Step 6. Light
A crucial aspect of any painting is the light source. When depicting sunset or dawn, enhance the background of the landscape with additional shades of pink and orange. Introduce pink reflections on the snow for added realism.
For a bright daytime sun, incorporate more white. Conversely, a night sky benefits from subdued gray and blue shades.
For a bright daytime sun, incorporate more white. Conversely, a night sky benefits from subdued gray and blue shades.
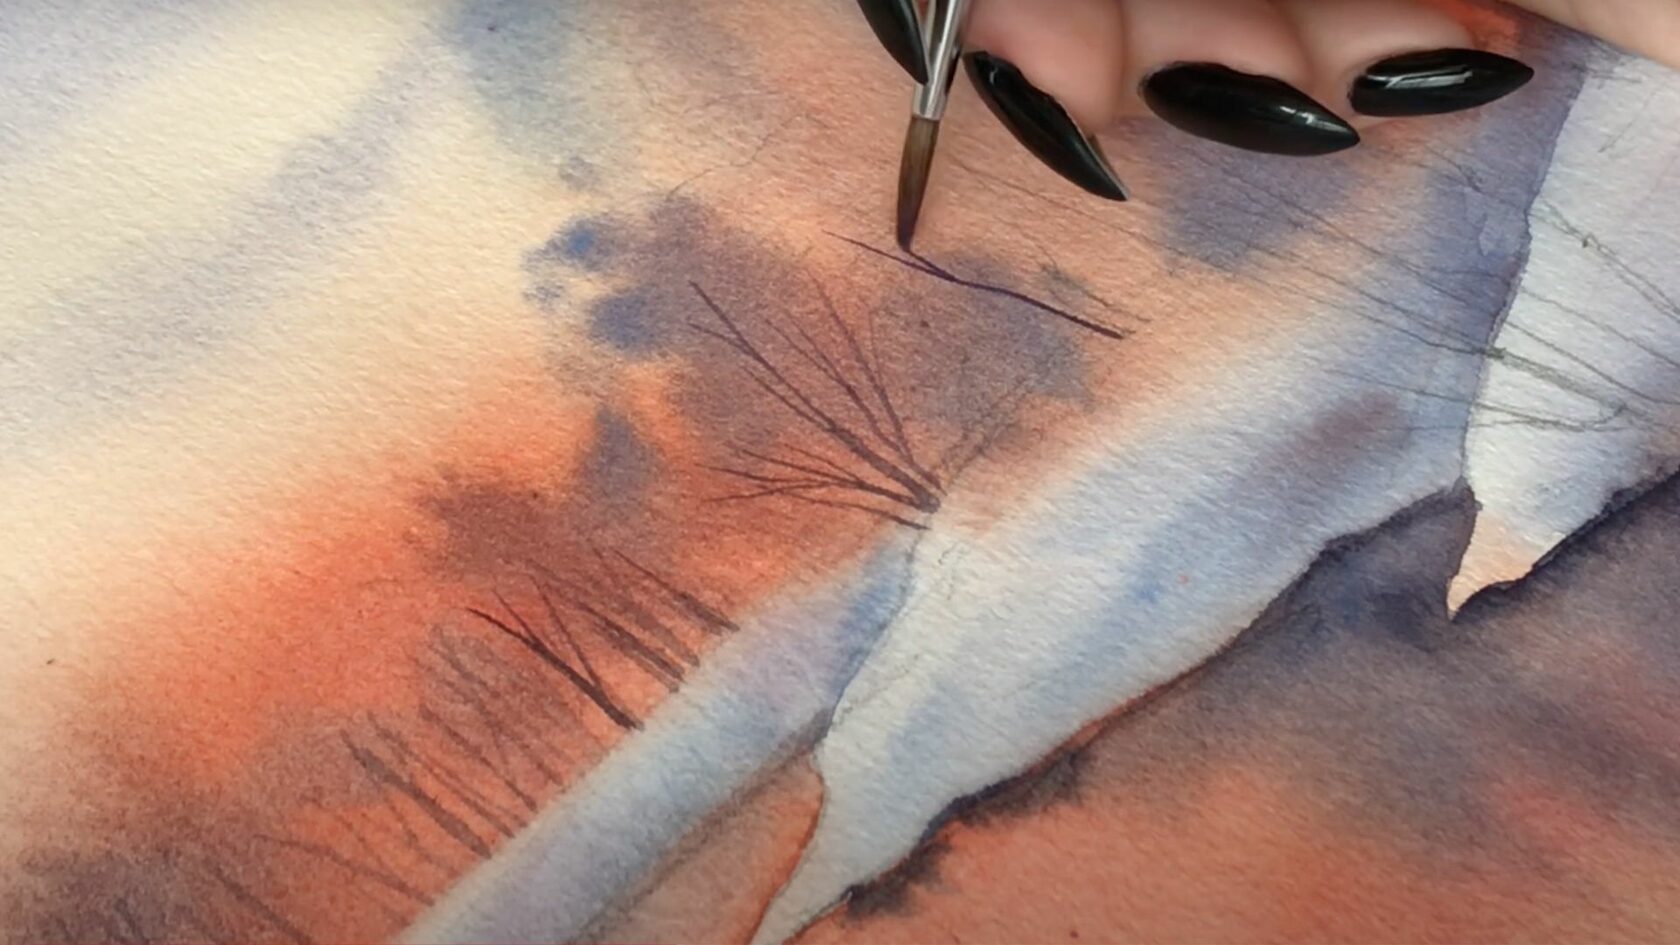
Step 7. Details
Upon finishing the artwork, consider adding small details like branches, tracks, snow, or other objects. Unlike other mediums, there's no need to varnish watercolor paintings. Simply allow the watercolor to dry naturally.